9 Ways to Access Your Raspberry Pi Remotely
We have broken up the different ways to remote access a Raspberry Pi into a few different categories
- Terminal Access (Text Based)
- Remote Desktop (Graphic Based)
- Specific Resources (Text based or Graphical based)
- Additional Information
Terminal Access
One of my favorite way of creating a remote connection to a Raspberry Pi is by using SSH (Secure Shell). This is because SSH gives me secure remote access to my Raspberry Pi in a light weight and fast way. SSH does this by creating an encrypted connection between my computer and the Raspberry Pi.
While I can’t do everything via SSH, I have found that 95% of the things I want to do remotely I am able to do quickly by just SSHing into the device and preforming what ever operation I am trying to do. Additionally, SSH is one of the easiest of all the ways to set up and it’s very reliable. There are, however, a few challenges to using SSH.
- You must know terminal commands.
- In order to navigate a remote system via SSH access you need to be familiar with the terminal commands needed to move around and view files
- Editing text files remotely can take some time to get used to.
- Two popular options are VIM and Nano
- VIM and Nano can be difficult at first…especially VIM.
I originally learned VIM, so it is my tool of choose. I will say though, for VIM, once you know a few basic commands and get used to command verses insert mode it becomes a great and fast command line text editor to use
SSH With Password
1. Enable SSH
Option 1: Reload the Raspberry Pi OS
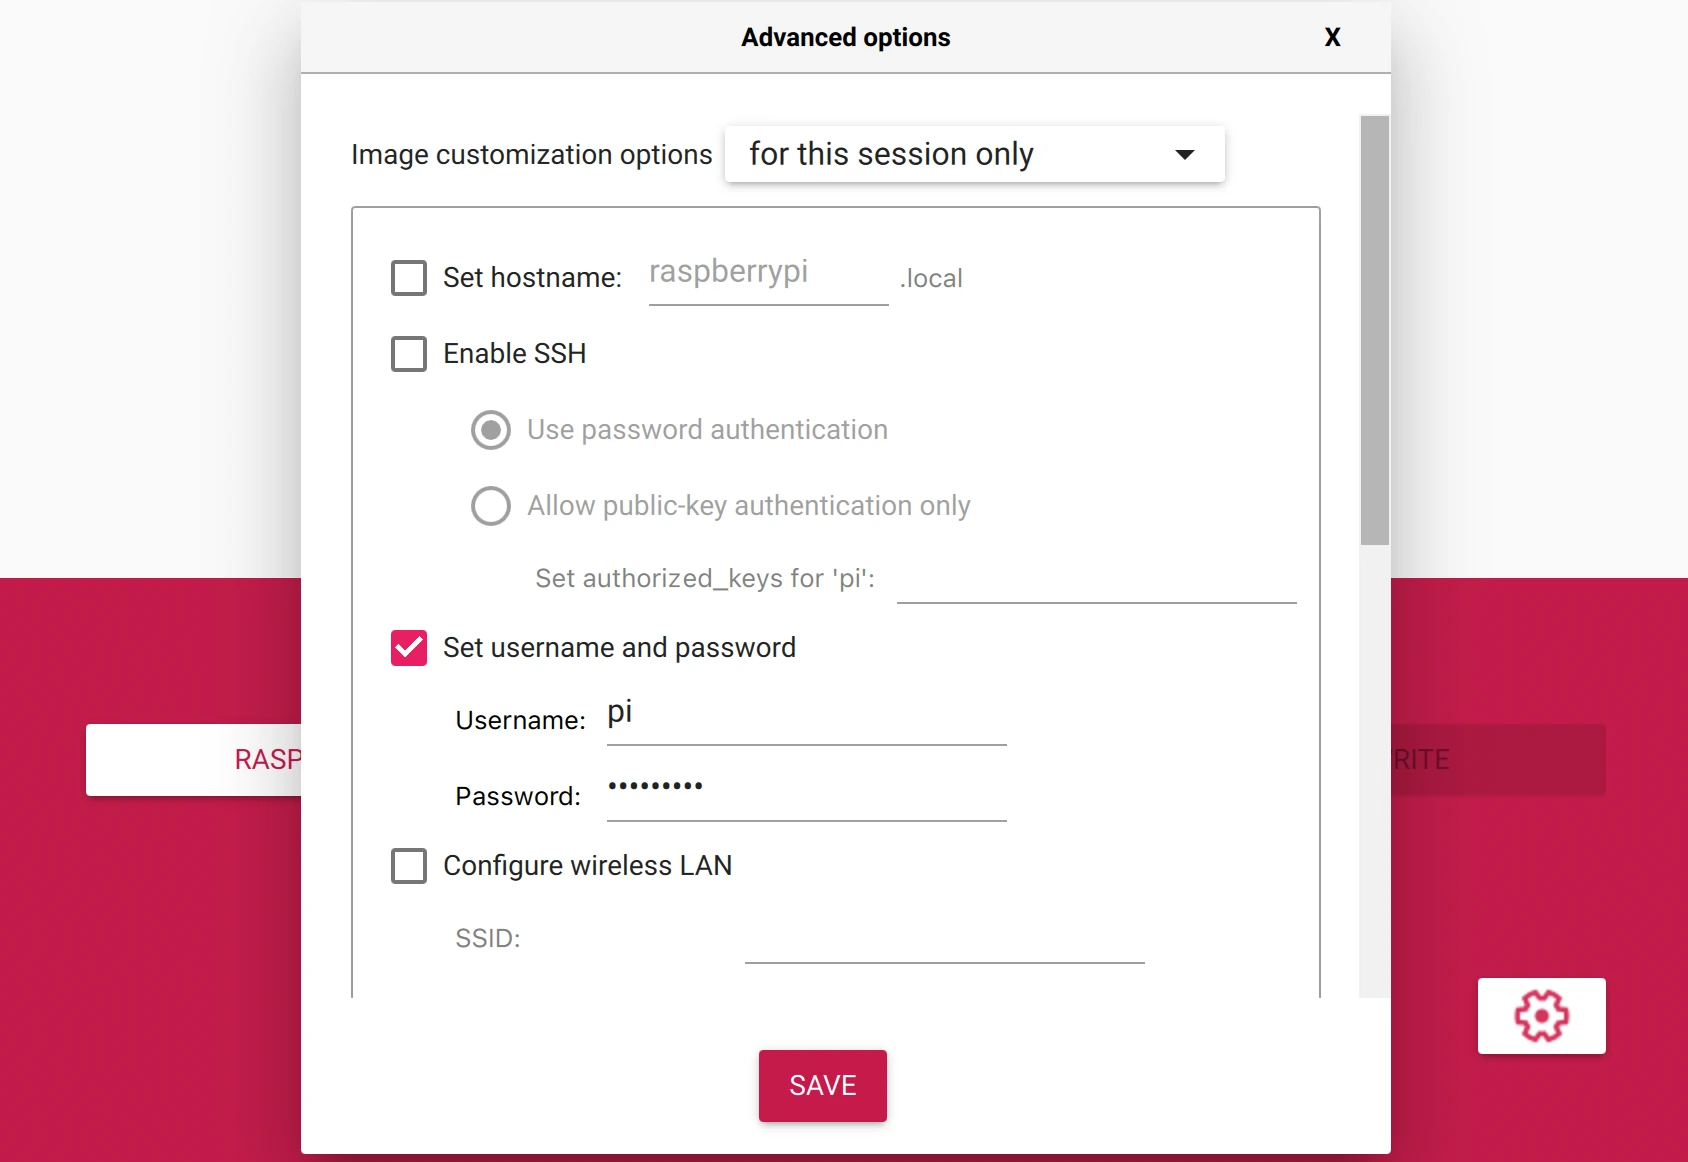
If starting with a new device the easiest way to enable SSH is to configure it in the Raspberry Pi Imager
- Click the configure gear icon
- Check
enable SSH - Fill out a
usernameandpassword. This is important as the imager will no longer set the defaultpiuser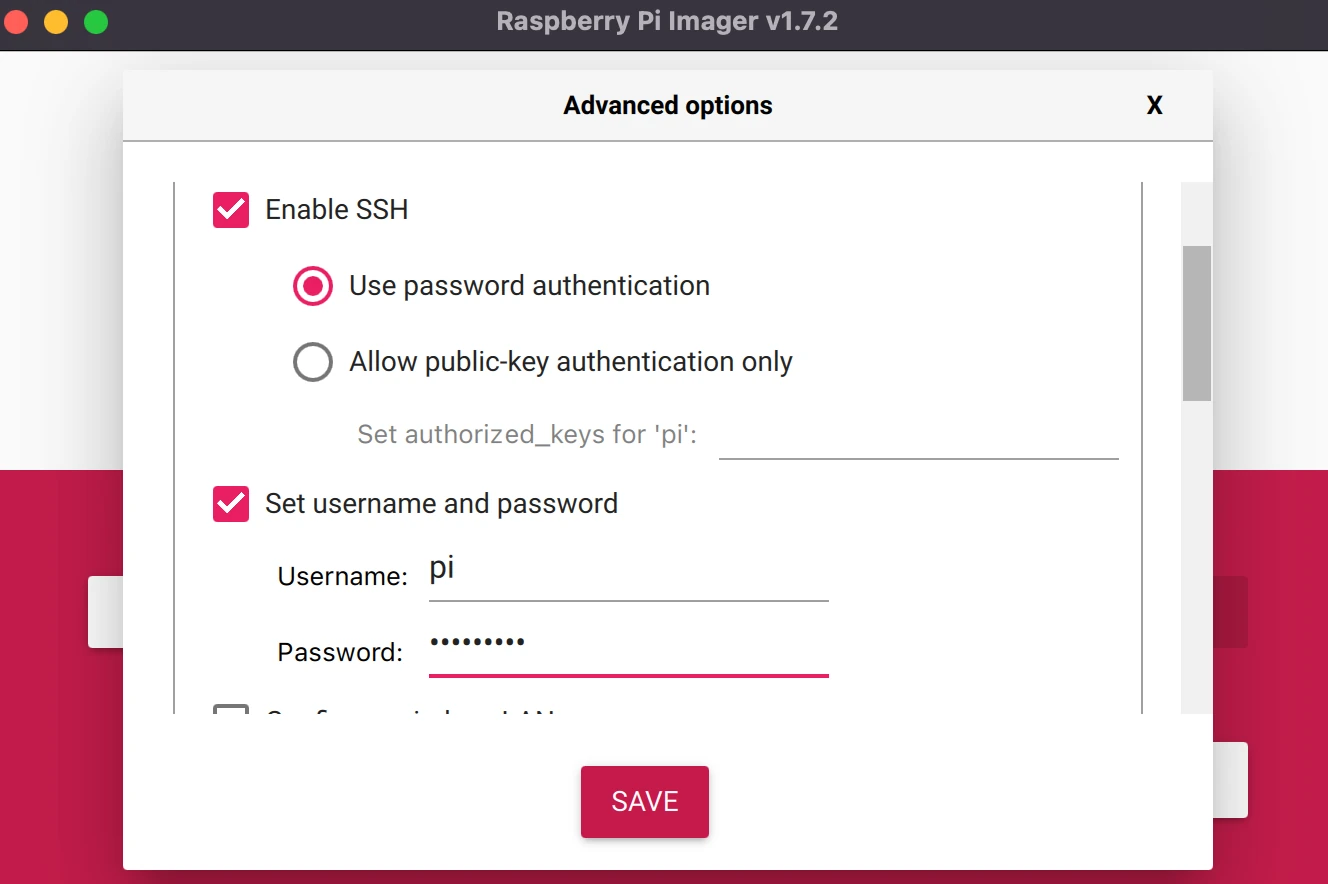
Option 2: Write to SD Card Without Reloading OS
If you already have a Pi up and running and do not want to reload the OS than SSH can be enabled by adding a file
named ssh to the root of the SD card. The following command will work on a Mac or Linux if in the SD cards directory
touch ssh
Option 3: Using raspi-config
- In the terminal on the Raspberry Pi execute the following command
sudo raspi-config - Select
Interface Options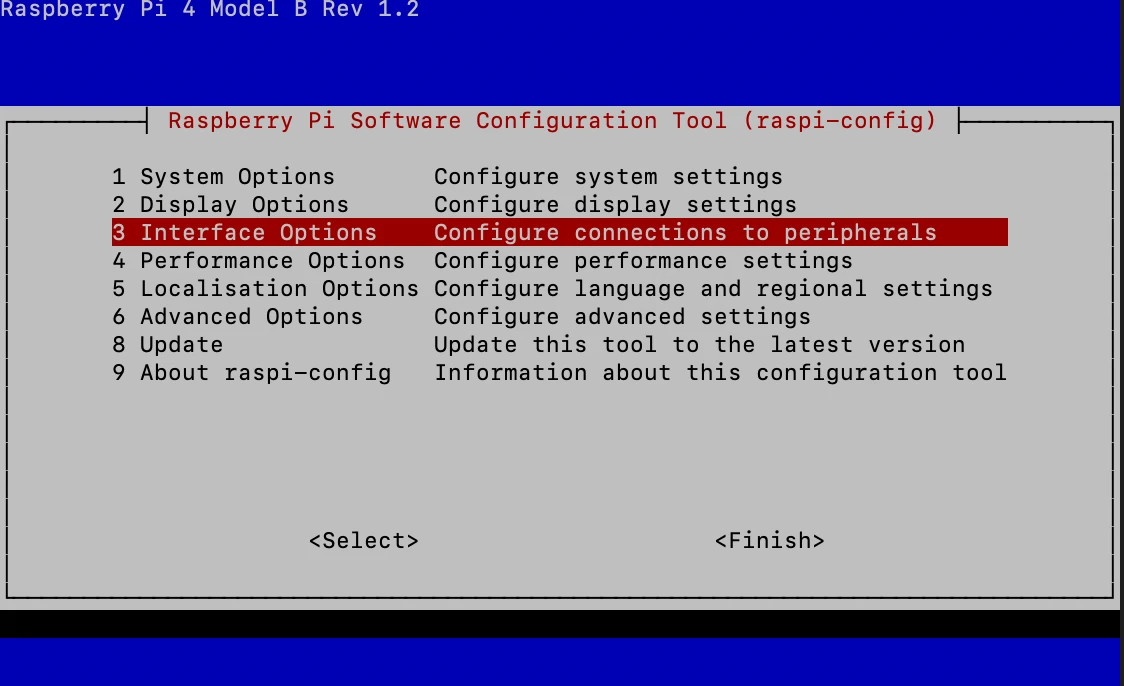
- Select
SSH
- Select
Yes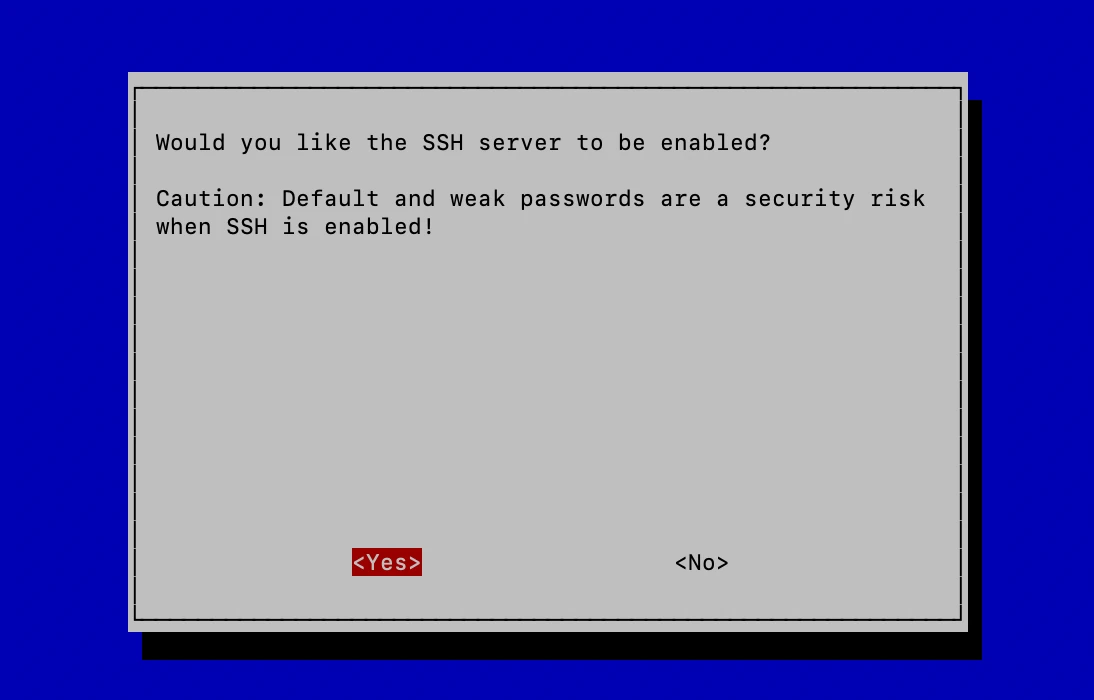
- Select
Okto finish enabling the SSH server on the Raspberry Pi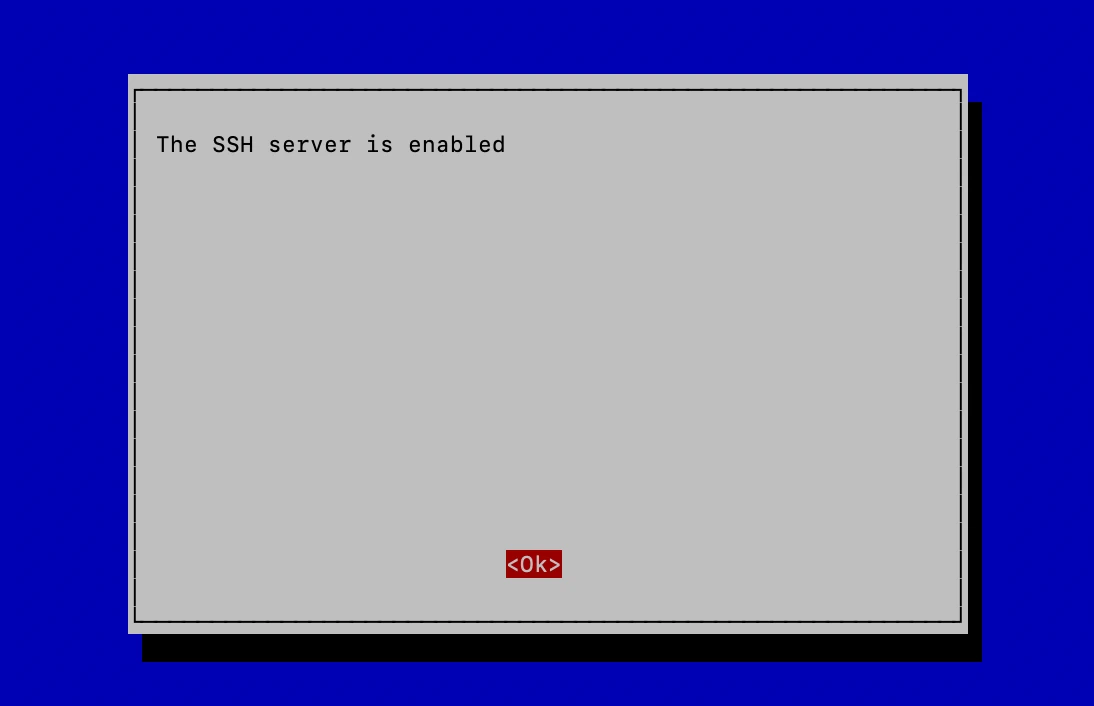
- Press
Escto exit raspi-config
2. SSH To Server
Find your Raspberry Pi’s IP address with the following command on the Pi
ifconfigIn our case the ip address is
172.16.1.60
Finally, connect to the Pi by using the ssh command on your computer. It is structured like this
ssh <user name on pi>@<pi's Ip address>so for our case we type inssh pi@172.16.1.60Be sure you are on the same local network as the Pi you are trying to SSH to
Mac and Linux have a built in SSH client. For windows computer you can install Putty or WSL (Windows subsystem for Linux)
If you plan to connect to your Raspberry Pi via IP address for more than a month you should review our note about static vs dynamic IPs
SSH Without Password (key based)
1. Enable SSH on Raspberry Pi
If you have not already enabled SSH on your Raspberry Pi view our instructions here for how to do that
2. Setup SSH Server
- On your computer generate a public and private key. On Linux or Mac run this command
This will generate two files ed25519 (private key. DO NOT SHARE!) and ed25519.pub (public key)ssh-keygen -t ed25519You can leave the password blank if you do not want to type one in when SSHing or you can add one to unlock access to use your local ssh private key
- Copy the newly generated
publickey for the location it was written to. For us, it was ~/.ssh/id_ed25519.pubcat ~/.ssh/id_ed25519.pub ssh-ed25519 FAKEA3NzaC1lZDI1NTE5AAAAIFl46wOgLnANotRealacuECsQnJngfuS3DCqfAez+T owner@Owners-AirDon’t use the keys on this website they are fake. Use the keys you generate
- On the Raspberry Pi create the ~/.ssh file if it does not already exist
mkdir ~/.ssh - The next step is to append the generated public key to the
authorized_keysfile. The following command will append or create the file and append if it does not existecho "ssh-ed25519 FAKEA3NzaC1lZDI1NTE5AAAAIFl46wOgLnANotRealacuECsQnJngfuS3DCqfAez+T owner@Owners-Air" >> ~/.ssh/authorized_keys
3. SSH To Server
Find your IP address with the following command on the Raspberry Pi
ifconfigIn our case the ip address is
172.16.1.60Finally, create an ssh connection to the Pi by using the ssh command on your computer. It is structured like this
ssh <user name on pi>@<pi's Ip address>so for our case we type inssh pi@172.16.1.60If you plan to connect to your Raspberry Pi via IP address for more than a month you should review our note about static vs dynamic IPs
Gadget Mode (SSH over USB)
Gadget mode is a very convent way to get terminal access to a Raspberry Pi by communicating via SSH over USB
Items Used
In this tutorial we used a Raspberry Pi (affiliate link) and a USB-C Cable (affiliate link)

Video Tutorial
1. Enable SSH
Option 1: Reload OS
If starting with a new device the easiest way to enable SSH is to configure it in the Raspberry Pi Imager
- Click the configure gear icon to access the advanced options
- Check
enable SSH - Fill out a
usernameandpassword. This is important as the imager will no longer set the defaultpiuser
Option 2: Without Reloading OS
If you already have a Pi up and running and do not want to reload the OS than SSH can be enabled by adding a file
named ssh to the root of the SD card. The following command will work on a Mac or Linux if in the SD cards directory
touch ssh
2. Configure config.txt
Enable gadget mode by inserting the Raspberry Pi’s SD card into a computer and navigating to its contents
On our Mac the drives name is boot and is located at /Volumes/boot
Edit config.txt and append the following to the file
dtoverlay=dwc2
The following two commands will chang the directory to /Volumes/boot and append dtoverlay-dwc2 to config.txt
echo "dtoverlay=dwc2" >> /Volumes/boot/config.txt
3. Configure cmdline.txt
Also in the SD card directory open cmdline.txt so that you can edit it
- After
rootwaitincmdline.txtadd the following
modules-load=dwc2,g_ether
- Save and exit
This is what mine looks like.
I would not copy and paste this but just use it as a reference to make sure you entered the additional data in the correct space and with the correct format
console=serial0,115200 console=tty1 root=PARTUUID=f4c426cb-02 rootfstype=ext4 fsck.repair=yes rootwait modules-load=dwc2,g_ether quiet splash plymouth.ignore-serial-consoles
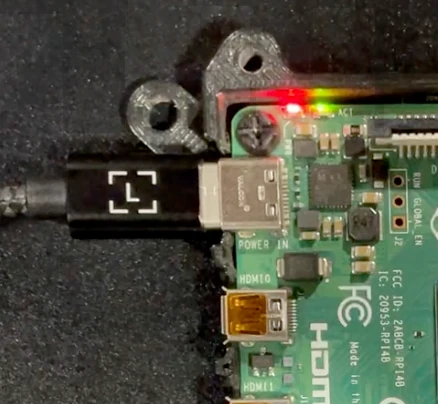
4. Connect via SSH over USB
Now all that is left is to
- Unmount the SD card plug it into the Pi
- Connect to the Pi vi the USB-C connector
- Execute the ssh command from your computer
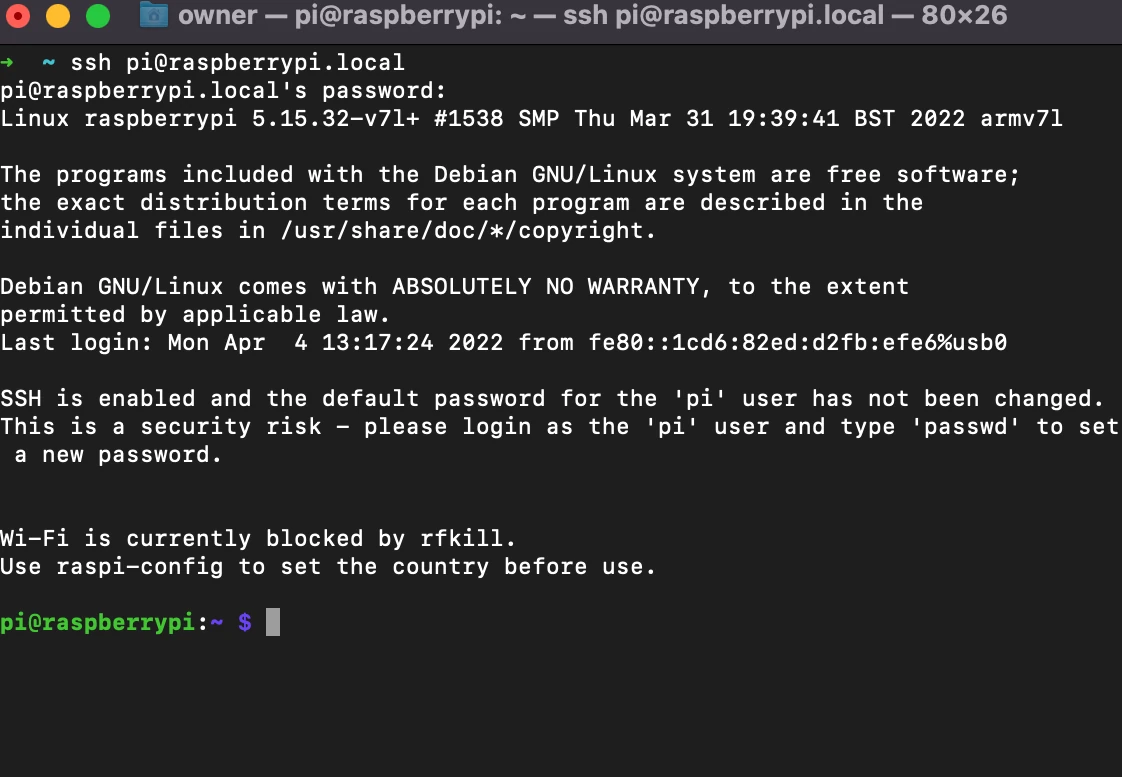
ssh pi@raspberrypi.local
If this is your first time connecting to the Pi via ssh than you will get a prompt asking you to accept the fingerprint. This is normal.
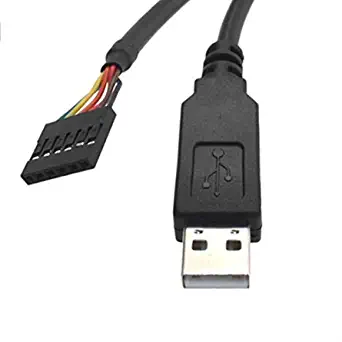
Serial Cable
Using a serial or console cable is a handy way to access a Raspberry Pi from your computer without needing to do much setup. You will need a serial cable (affiliate link) and some male-to-female jumper wires (affiliate link). Here is the ftdi serial cable I am using for this tutorial as well as some jumper wires.
Items Used
Need a user setup on the device. The pi user name and password no longer set by default. Click here for more info
Video Tutorial
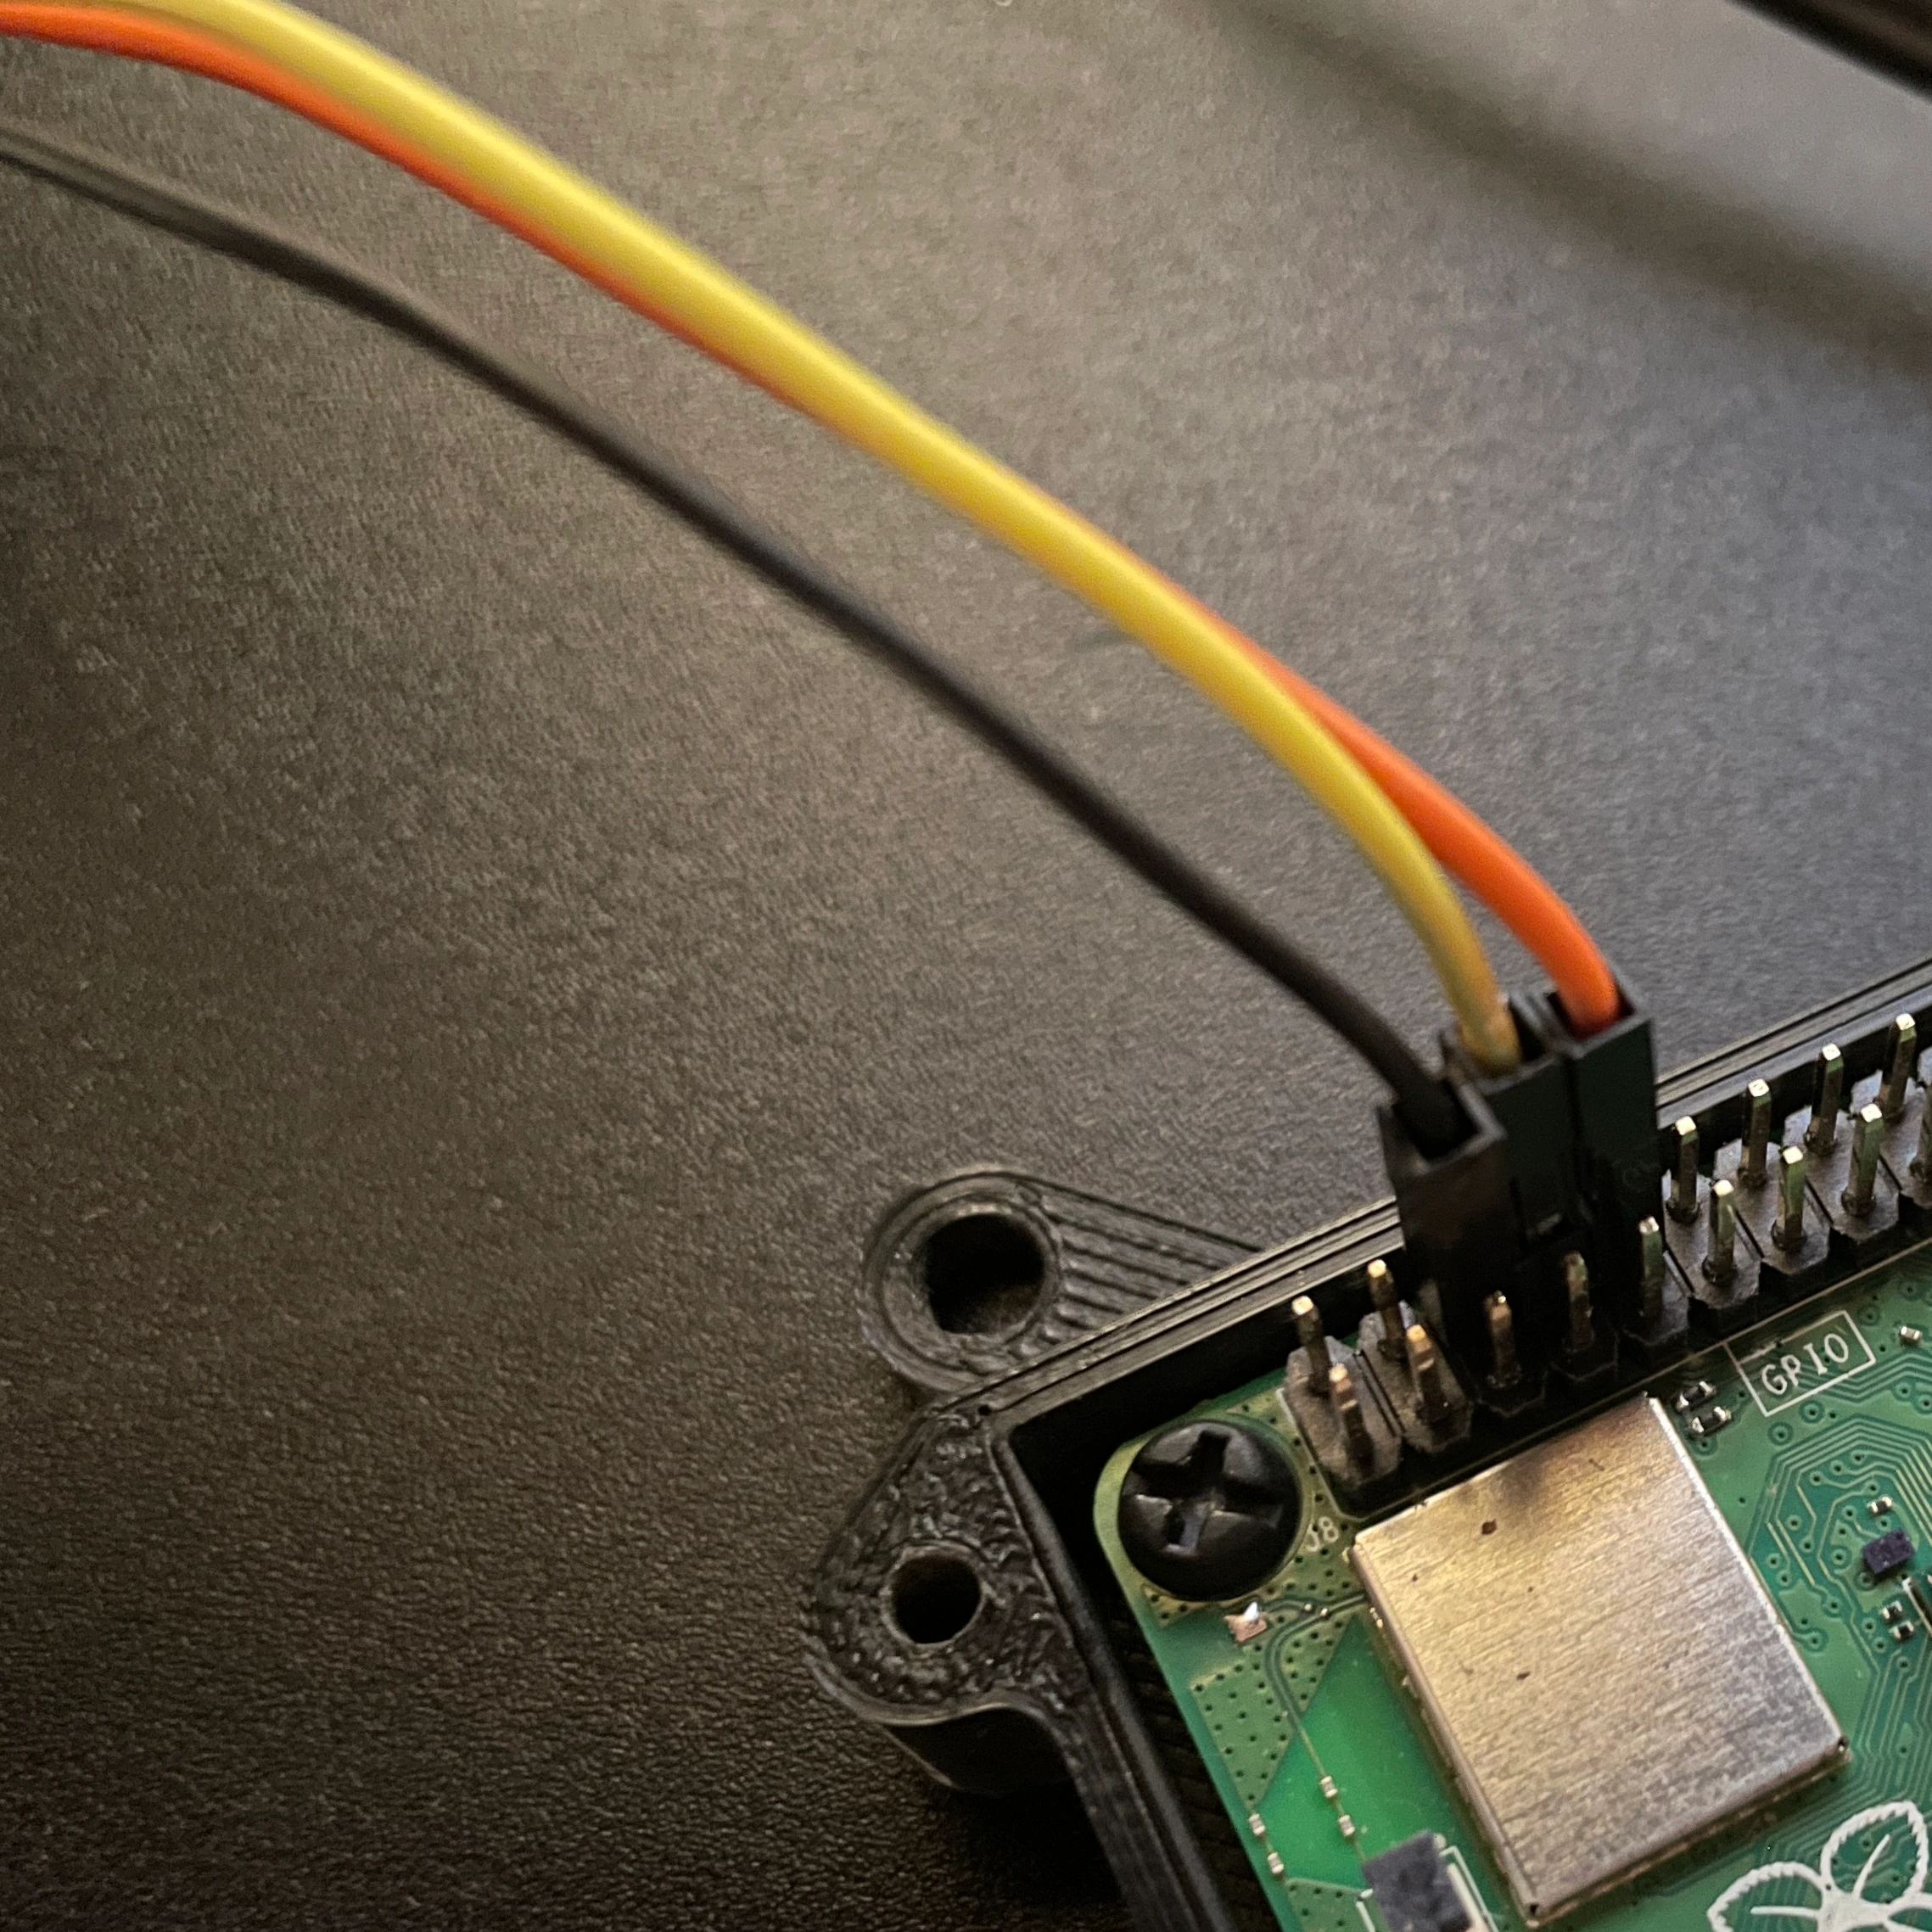
1. Connections
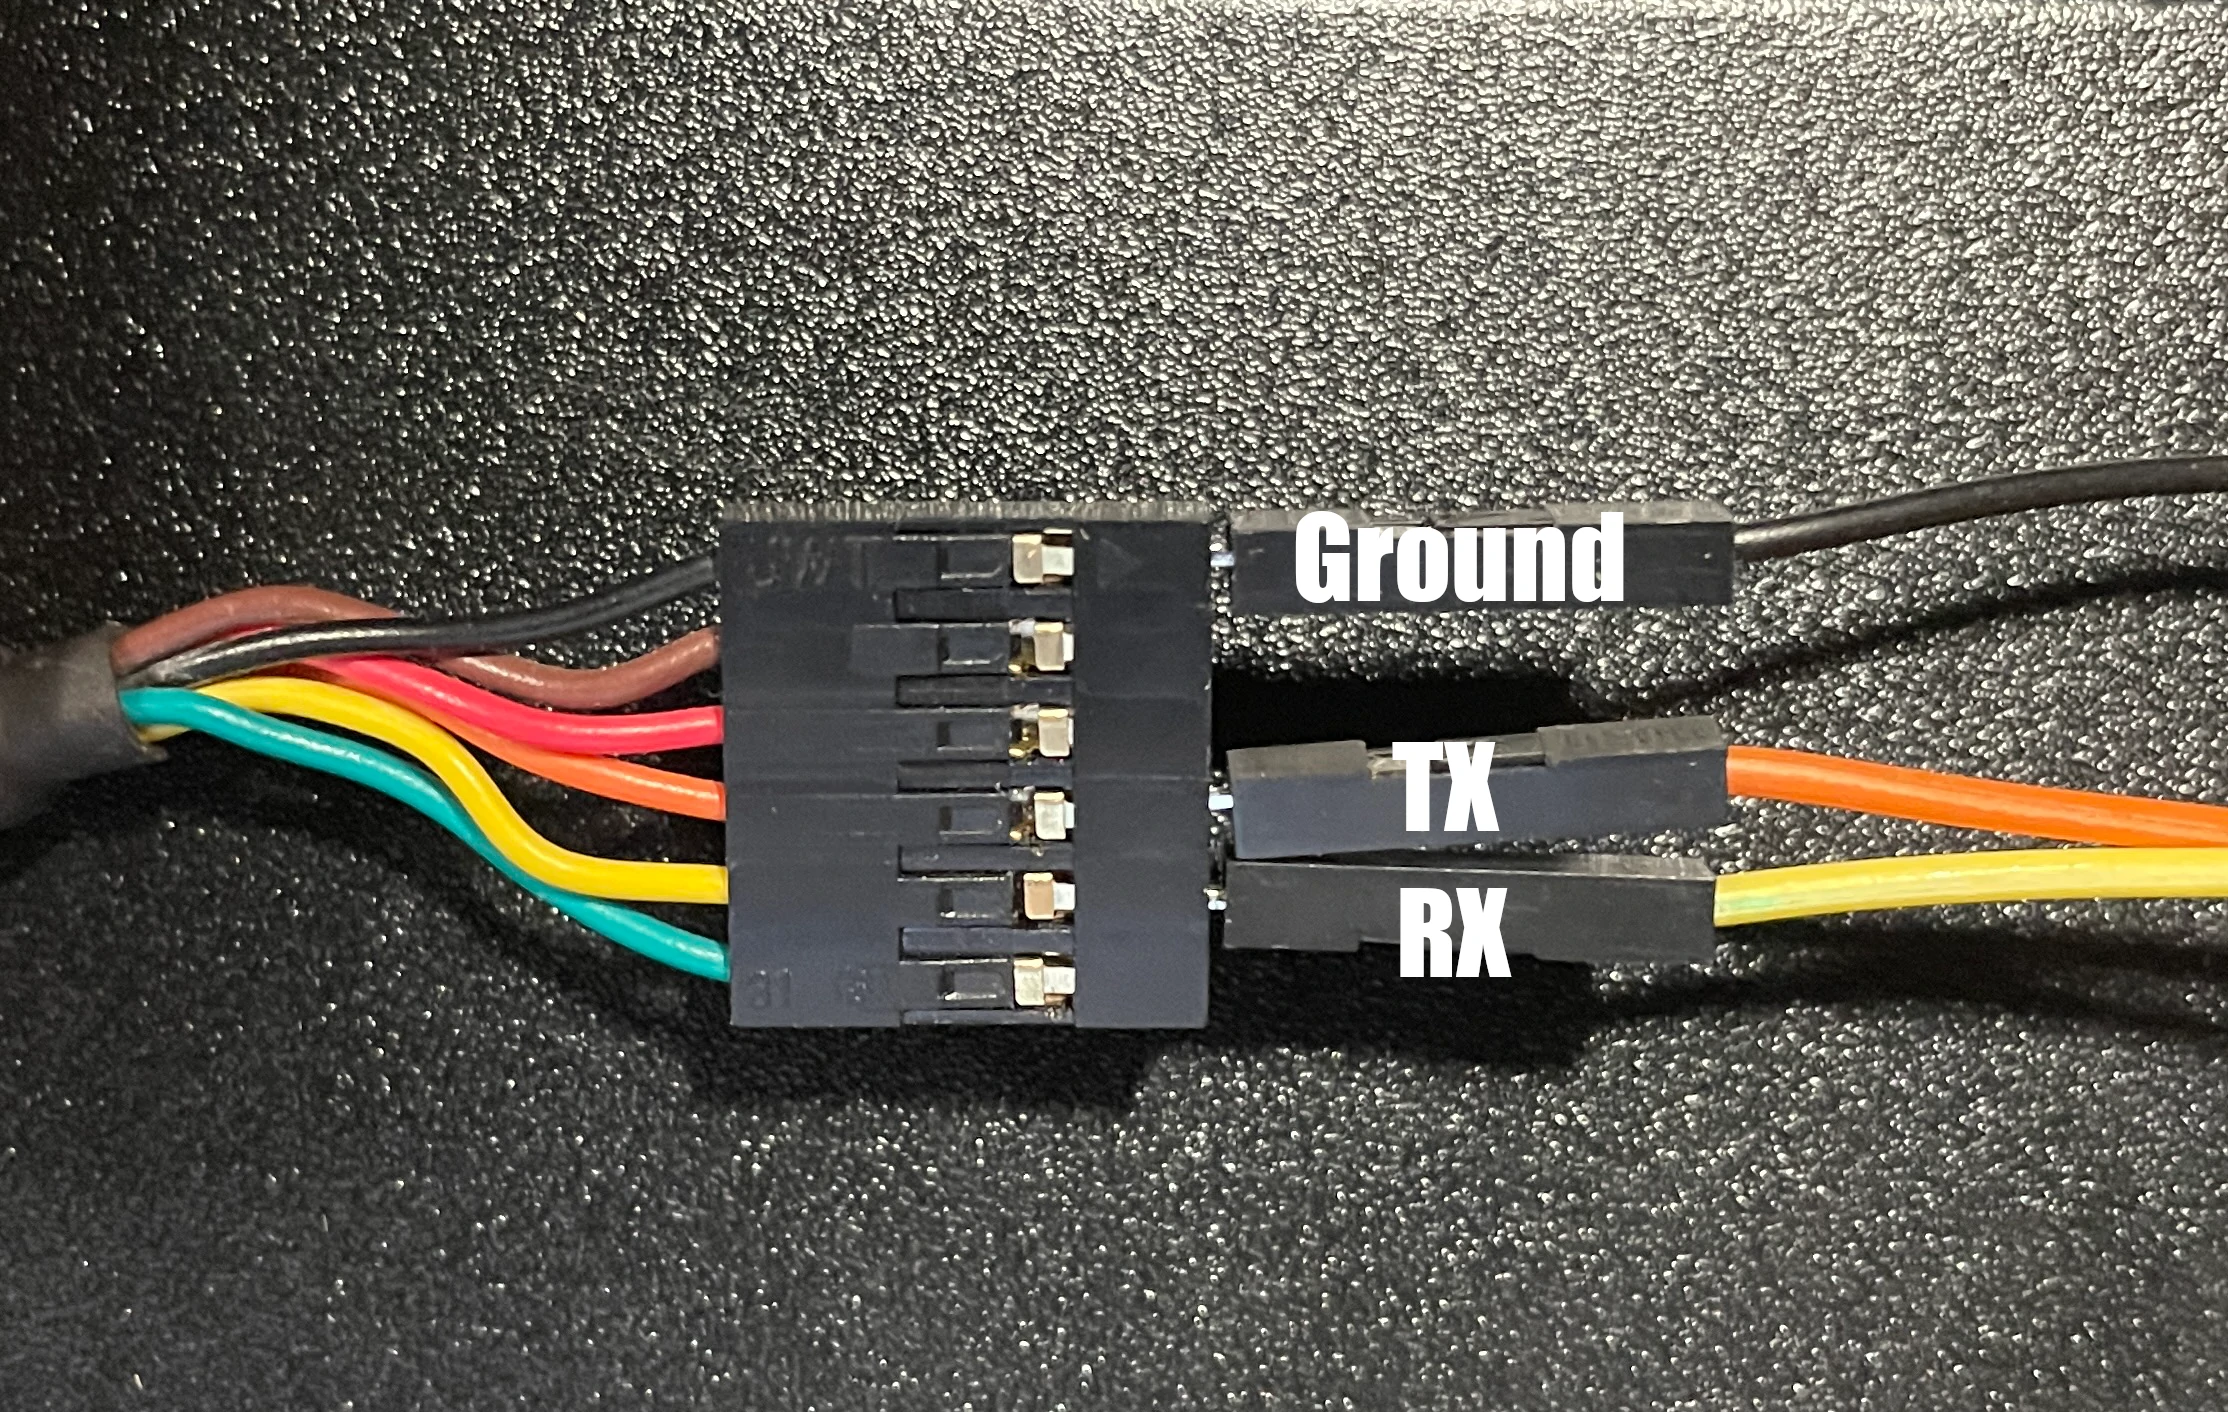
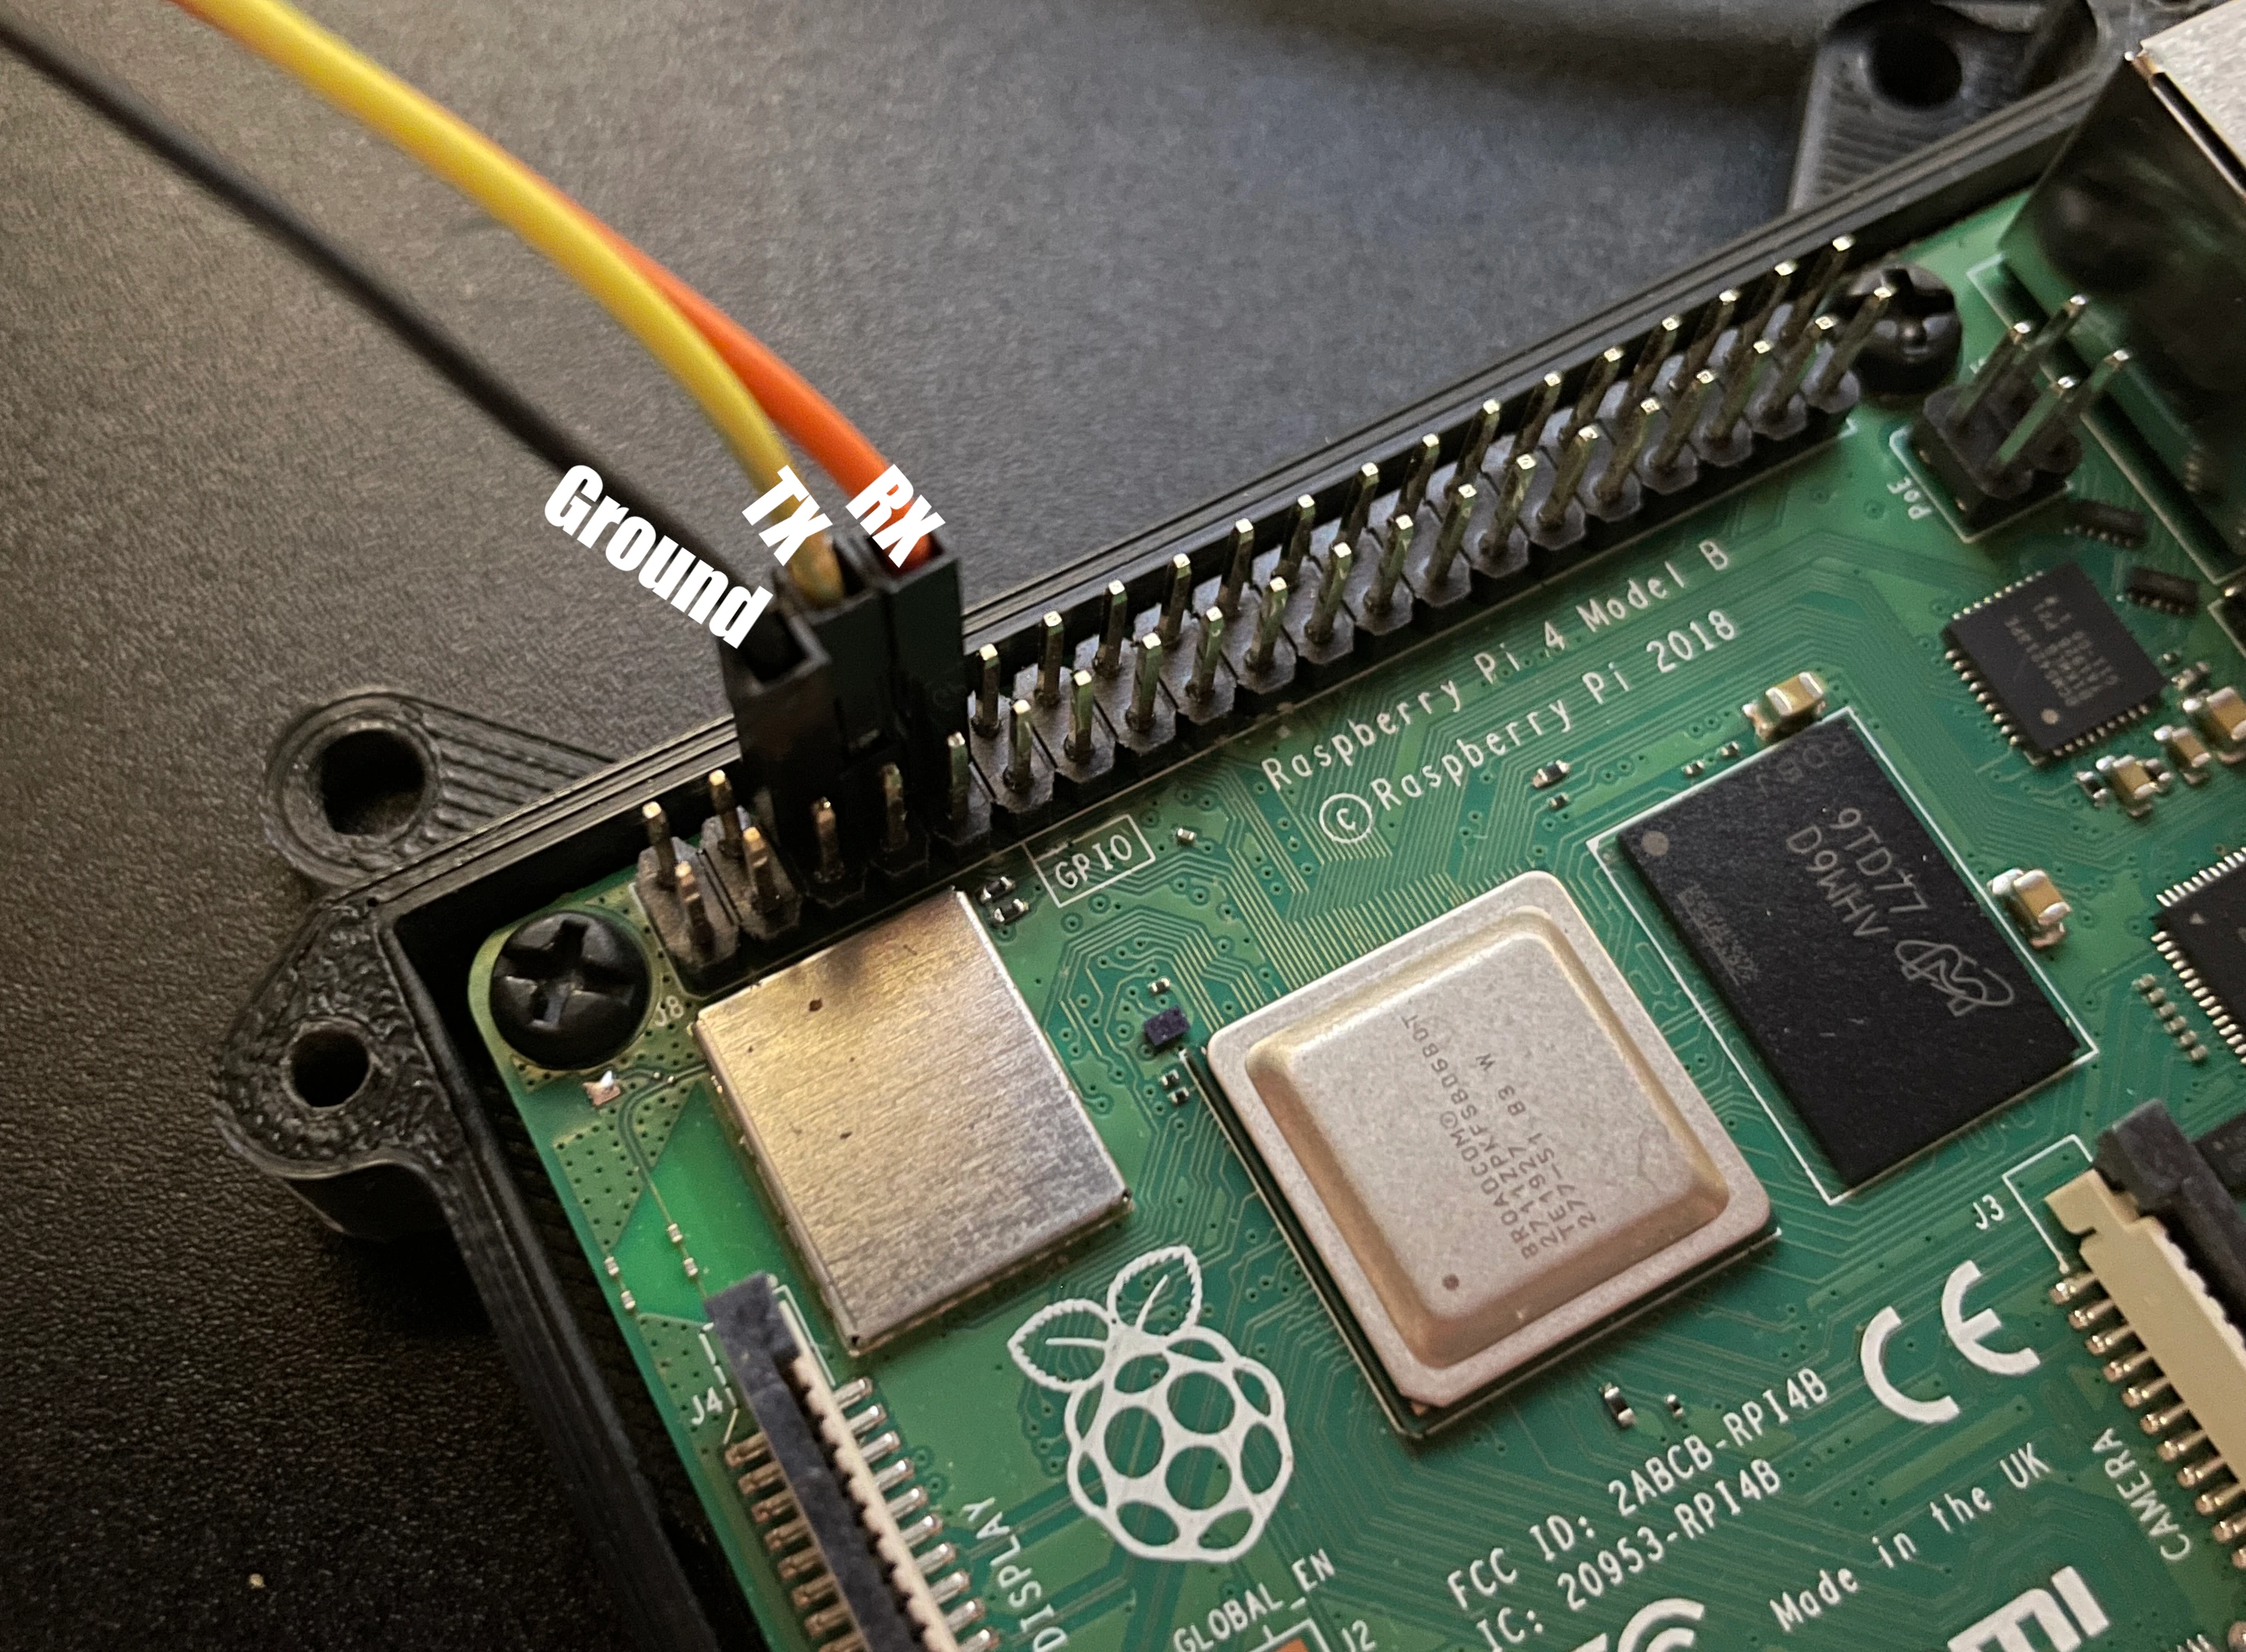
Use jumper cables to connect the serial cable to the approprate pins on the Raspberry Pi. In this tutorial we will be using a Raspberry Pi 4B
Note: The for UART TX is connected to RX (TX->RX) and vice versa (RX->TX). The labels on the images are from the perspective of the pins of the Pi and the pins of the Serial cable not the jumper cables
2. Configuration
To enable the serial communication on the Raspberry Pi follow these steps
- Attach the Raspberry Pi’s SD Card to a computer
- Navigate to the SD Card on the computer
On our Mac the drives name is
bootand is located at/Volumes/bootcd /Volumes/boot
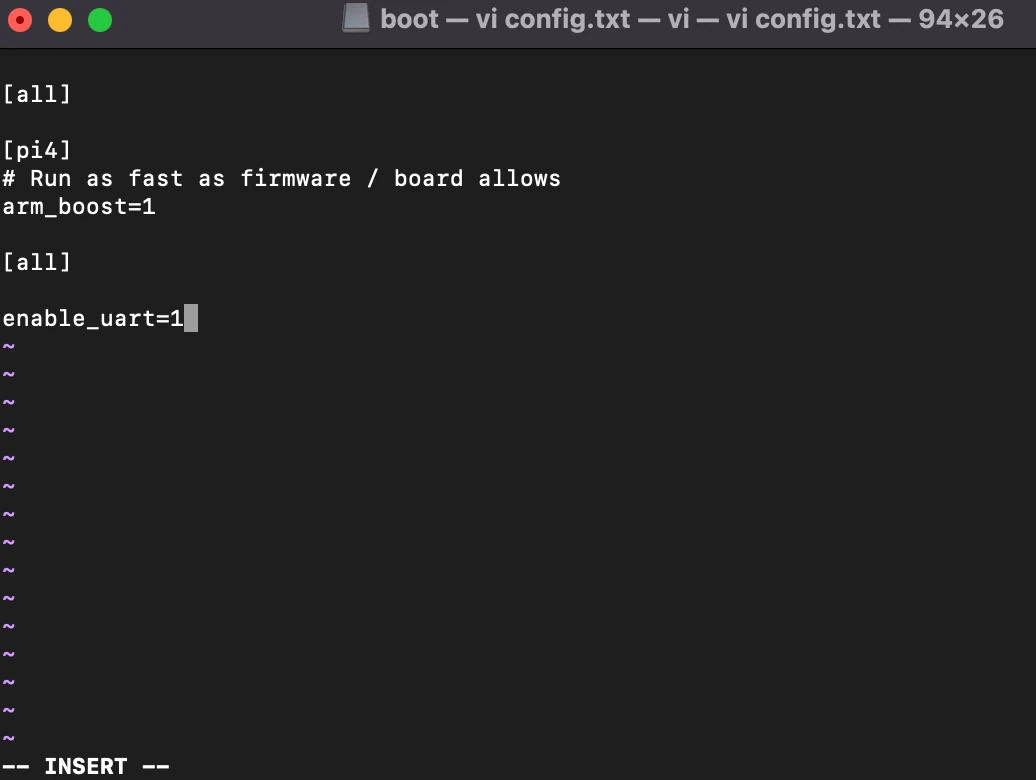
Append
config.txtwithenable_uart=1Option 1: Via echo command
echo "enable_uart=1" >> config.txtOption 2: Using a text editor
Eject the SD card and put it back into the Pi
3. Opening Serial Connection
- Plug the serial cable into a computer
- Open Serial Connection
For Mac find the FTDI device
ls /dev/tty.*ours was named
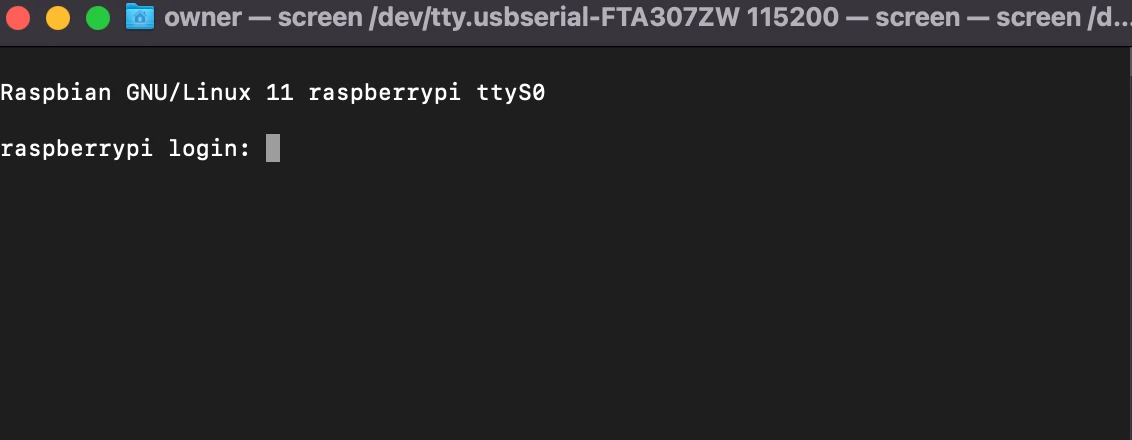
/dev/tty.usbserial-FTA307ZWOpen device with
screanat a baud rate of 115200screen /dev/tty.usbserial-FTA307ZW 115200
4. Final Steps
Power on the Raspberry Pi. If everything is connected and configured correctly after a few seconds you should be prompted with a login screen
Remote Desktop
Remote desktop is easy to interface with because when you connect to the device your screen shows the raspberry pi desktop as if you were plugged directly into the Raspberry Pi. It’s not all upside though because a remote desktop connection can be laggy and slow. This is especially true on the smaller raspberry Pis like the Zero and the older Raspberry Pis as well. It just takes a lot more processing power to send the updates to the screen across the network than it does to send back a few lines of text like the Terminal Access method
VNC
Setup VNC Server
- In the terminal on the Raspberry Pi execute the following command to bring up the Raspberry Pi configuration
sudo raspi-config - Select
Interface Options - Select
VNC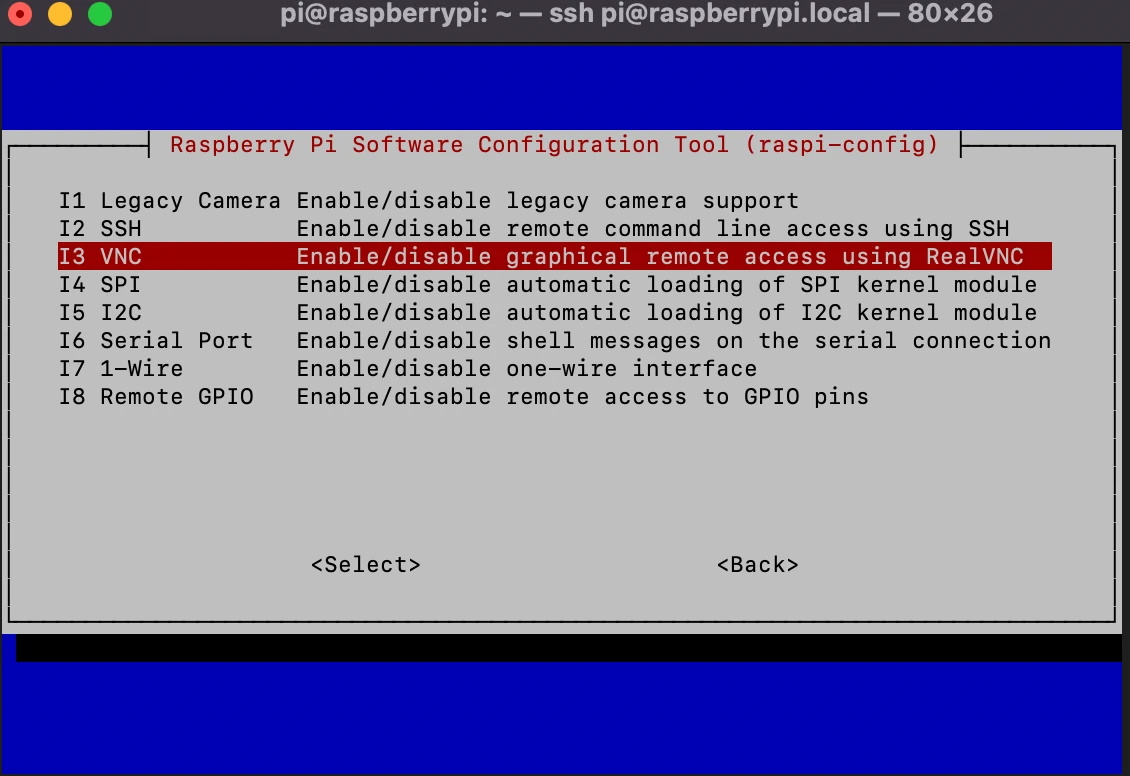
- Select
Yes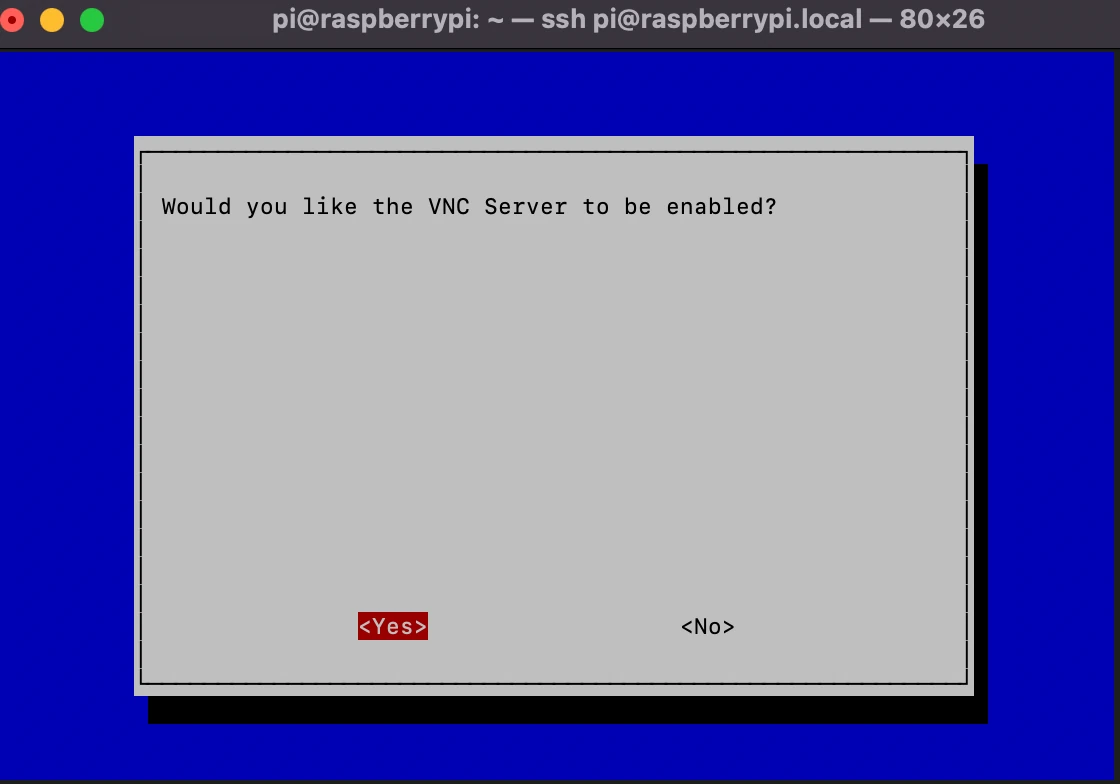
- Select
Okto finish enabling the VNC server on the Raspberry Pi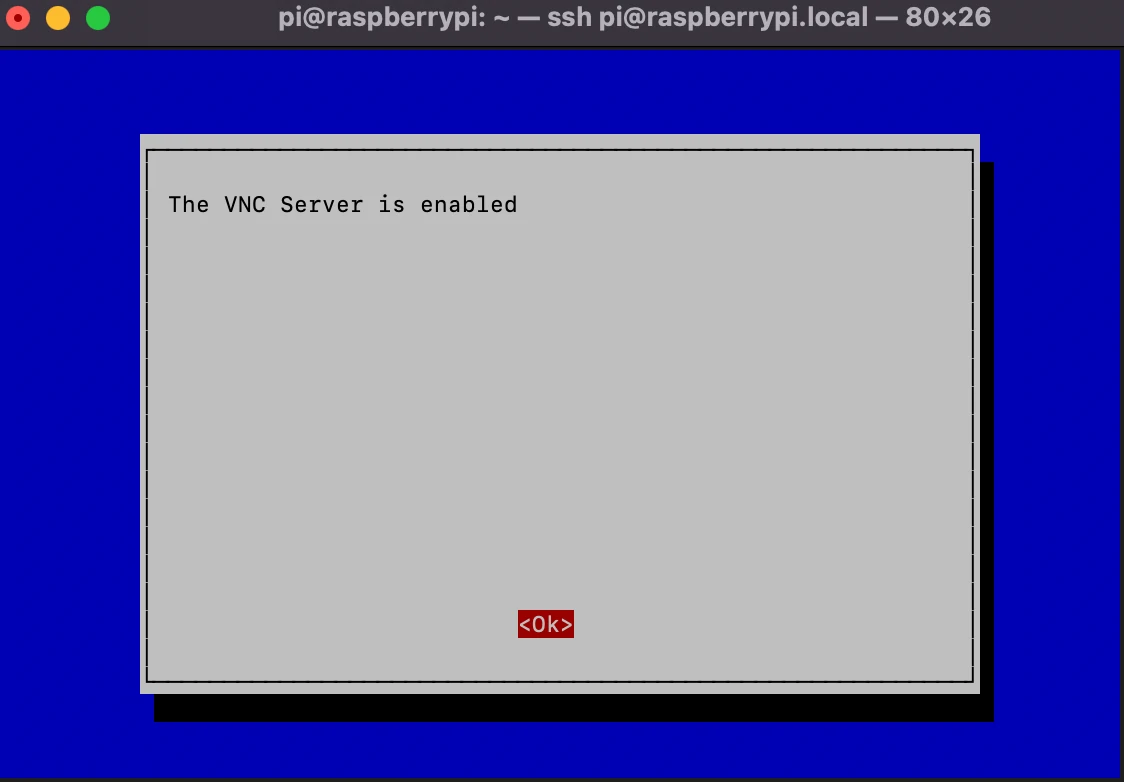
- Press
Escto exit raspi-config
Install VNC Client
- We are going to use VNC Viewer but you can use what ever VNC Viewer you like
- Put the IP address of your Raspberry Pi in the address bar and press Enter
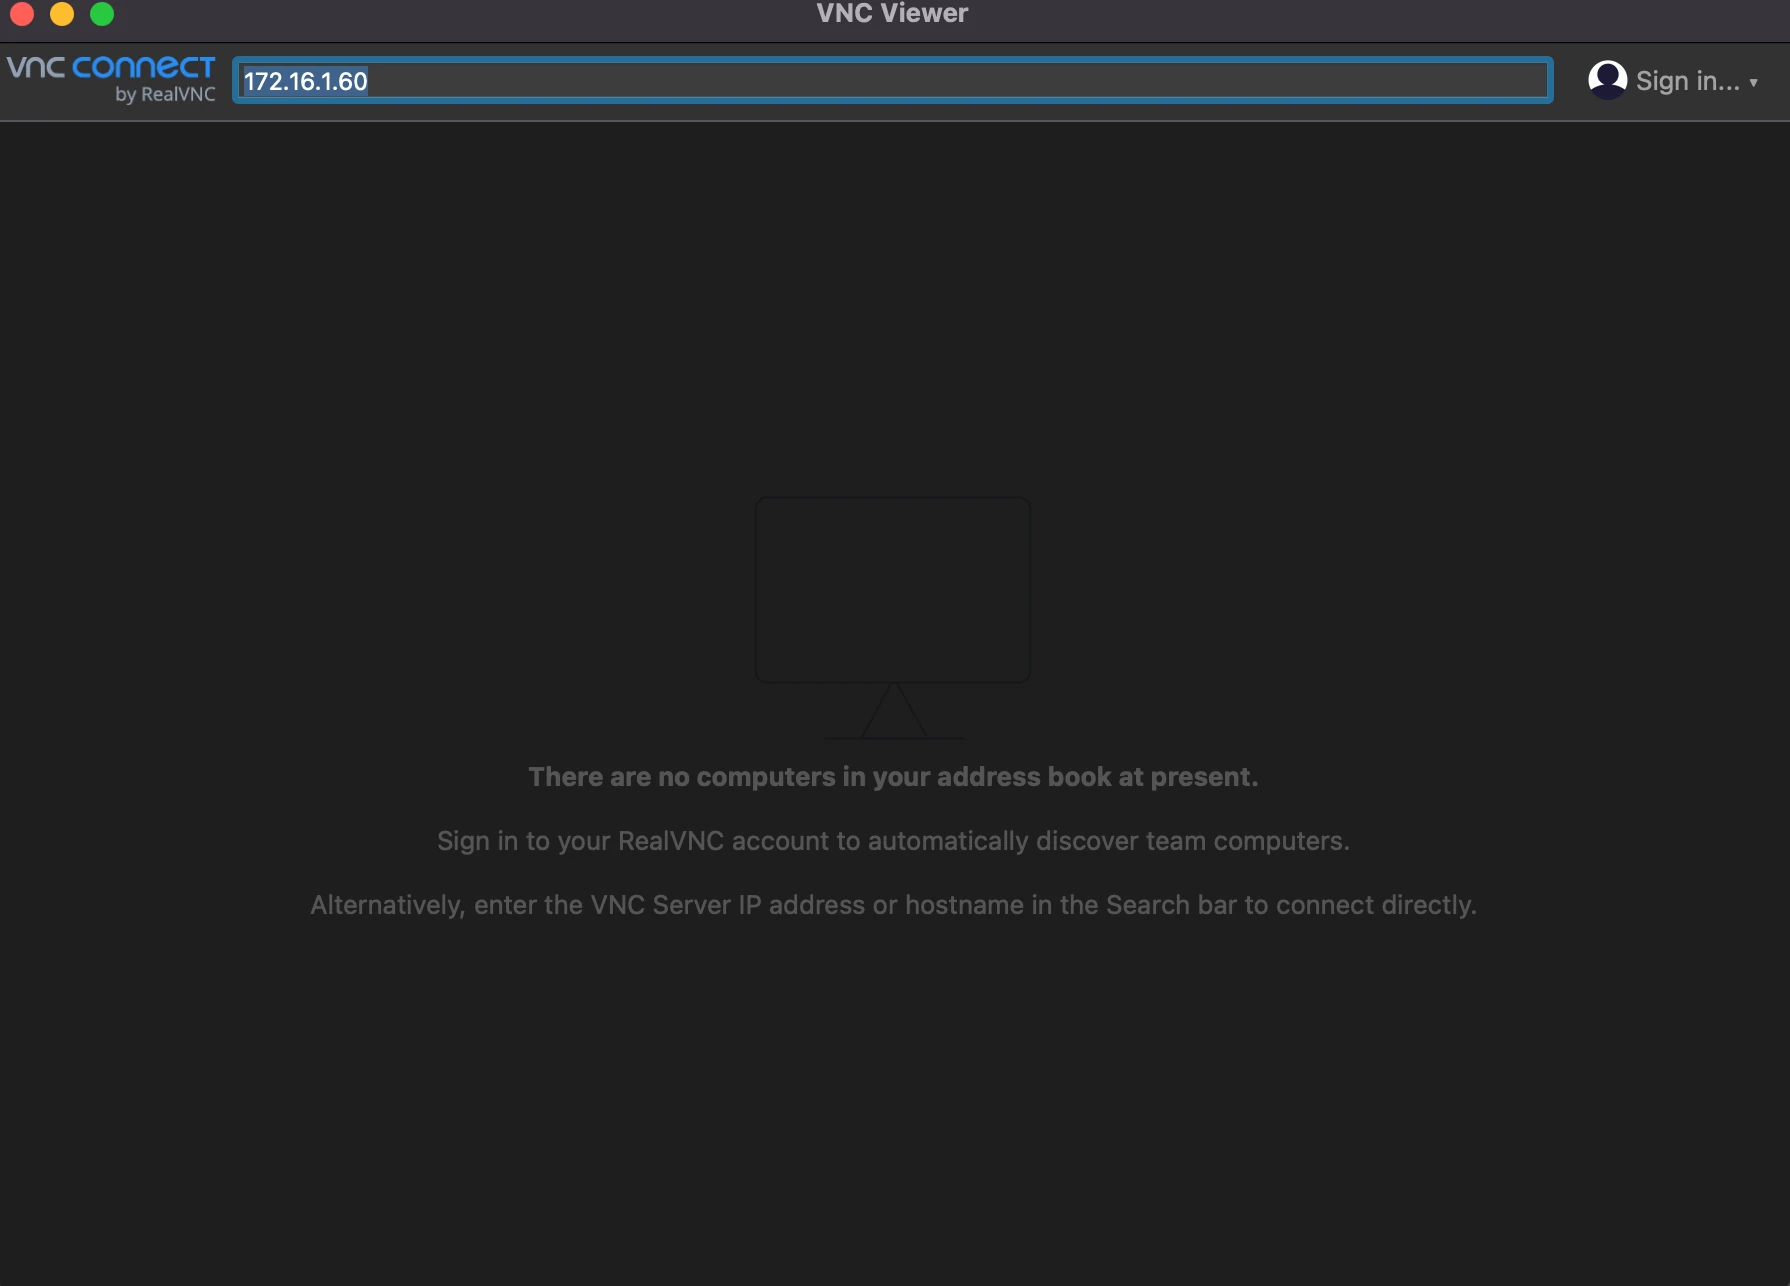
- Enter the login information. If you do not have this set go here to see how to do that.
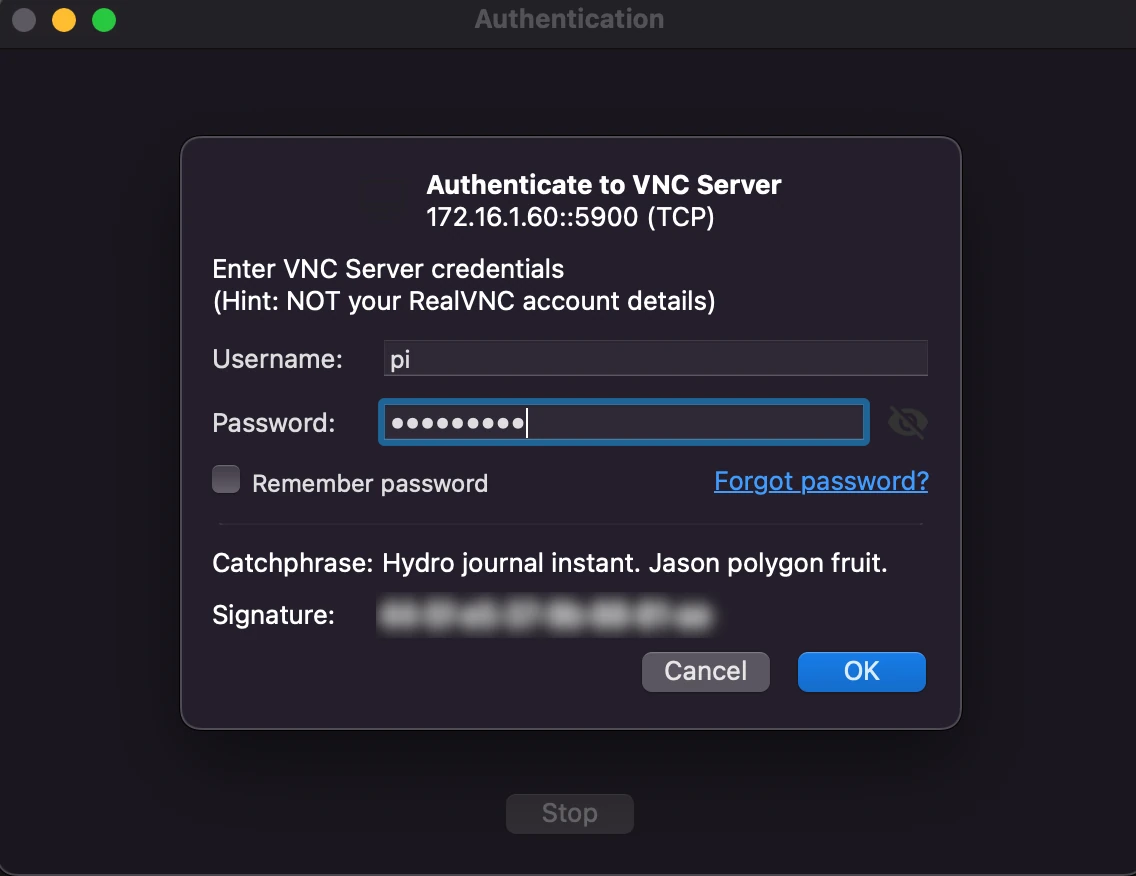
Connect to VNC Server
Create a VNC connection and start using the GUI (graphical user interface) remotely
Personally I think this way to use the Pi remotely is very slow and prefer to use one of the terminal based methods

Specific Resources
Sometimes you don’t want or need a lot of access to the remote Raspberry Pi you are trying to interface with. For example, if you had a Pi setup to take photos every hour to build a time laps you may just want to copy the remote files to your local computer. Luckily there are tools like scp (secure copy) that allow you to run a command in a terminal and download all the remote images with little setup required. Additionally, you may be using the Raspberry Pi as a NAS (Network Attached Storage) and just want to access the files on its system like any other folder on your Windows, Mac, or Linux machine. Good news! There are tools for these things as well like NFS and SMB that allow you to view the Raspberry Pis file system via the networking tools provided by your computers operating system.
Secure Copy (SCP)
Secury Copy allows you to copy files from a remote host to the computer you are executing the scp command on. Or you can copy files from your local host to a remote device
1. Setup SSH
SCP works over SSH so set this up first. You can do it with password authentication or semetric key authentication
2. Copy Files
Option 1: Copy files from a remote Raspberry Pi (Pi -> Local)
For this example we created a file named test.txt in the /home/pi directory of the Raspberry Pi
The following command will copy test.txt to our local home directory ~ is a shortcut for your home
directory on a Linux or Mac computer
scp pi@172.16.1.60:/home/pi/test.txt ~/
Option 2: Copy files to a remote Raspberry Pi (Local -> Pi)
For this example we created a file named local.txt in our home directory on our local computer. The following command
will copy it from our home directory to the /home/pi directory on the Pi
from a Linux or Mac computer
scp ~/local.txt pi@172.16.1.60:/home/pi/
Samba (SMB/CIFS)
1. Update Raspberry Pi
sudo apt update
sudo apt upgrade
2. Install SAMBA server
sudo apt install -y samba samba-common-bin
3. Create share director
we are going to create a share directory named samba_share in our home directory of /home/pi/
cd ~
mkdir samba_share
4. Configure SAMBA
modify the /etc/samba/smb.conf
sudo vi /etc/samba/smb.conf
This is what the end of our smb.conf looks like
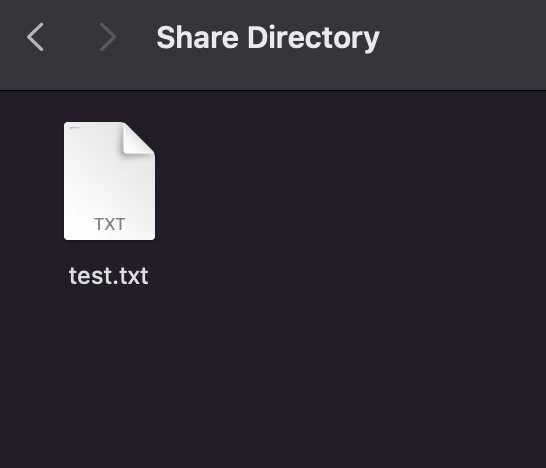
[Share Directory]
   comment = SAMBA share on Raspberry Pi
   browseable = yes
   path = /home/pi/samba_share
   guest ok = yes
   writable = yes
   create mask = 0744
   force user = pi
Here are the links to the SAMBA documentation for the commands we used
path = /home/pi/samba_share
guest ok = yes
writable = yes
create mask = 0744
force user = pi
5. Restart the SAMBA service
sudo service smbd restart
6. Connect to the SAMBA service from a different computer
On a Mac OS
From finder go to Go->Network
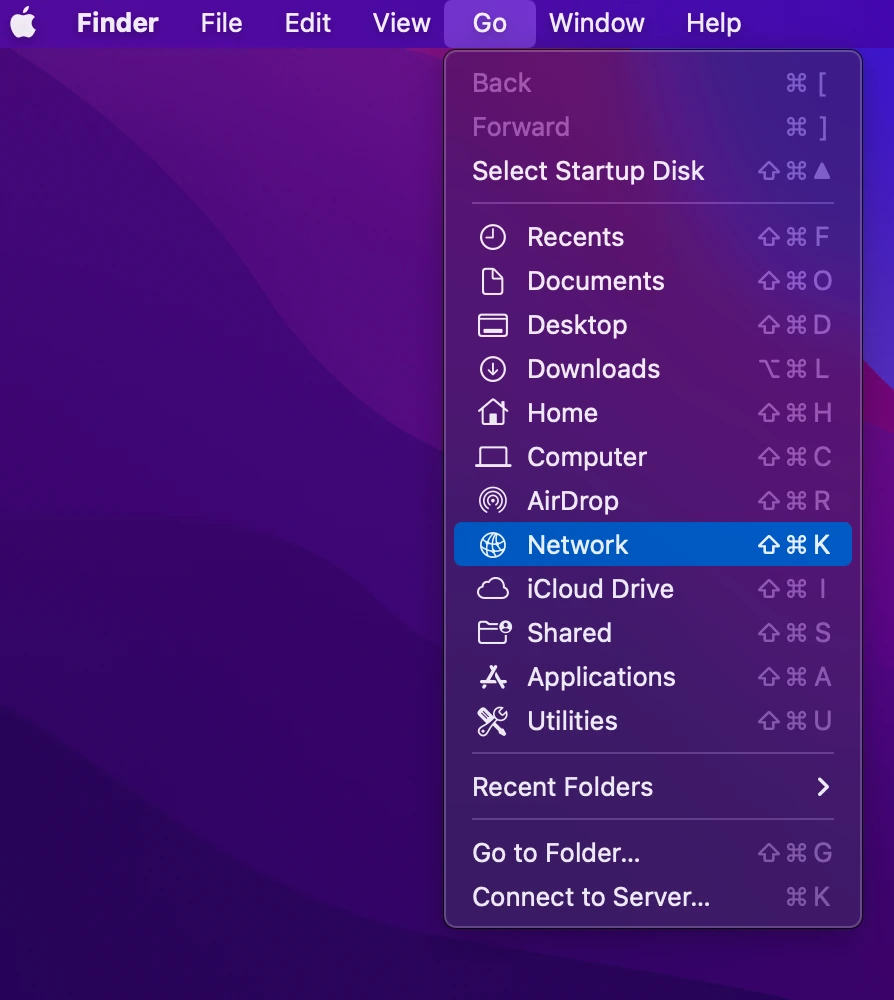
The device is named RASPBERRYPI by default, click on that
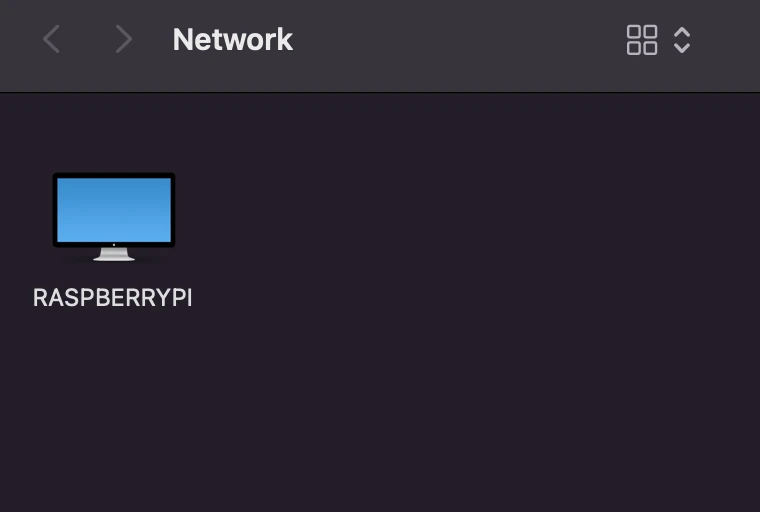
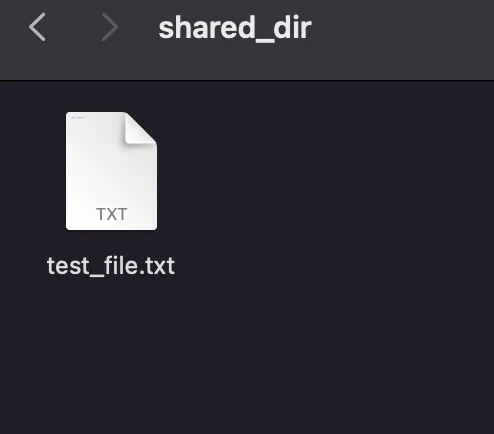
Finally, navigate to the shared directory
Network File System (NFS)
1. Update the Pi
sudo apt update
sudo apt upgrade
sudo apt install -y nfs-kernel-server
2. Install NFS
sudo apt install -y nfs-kernel-server
3. Create a directory to be shared
in our case we will create shared_dir in our home directory of /home/pi/
cd ~
mkdir shared_dir
4. Configure NFS to include the shared_dir
append /home/pi/shared_dir *(rw,all_squash,insecure,async,no_subtree_check,anonuid=1000,anongid=1000) to the
/etc/exports file
sudo echo "/home/pi/shared_dir *(rw,all_squash,insecure,async,no_subtree_check,anonuid=1000,anongid=1000)" >> /etc/exports
Update the nfs server
sudo exportfs -ra
5. Connect to the NFS server
In our example we are going to be using Mac OSX to connect the NFS folder on the Raspberry Pi. There are two ways to mount the drive.
Option 1: Using finder
append nfs.client.mount.options = vers=4.0 to /etc/nfs.conf
echo "nfs.client.mount.options = vers=4.0" | sudo tee -a /etc/nfs.conf
In finder select Go->Connect to Server or press command + k
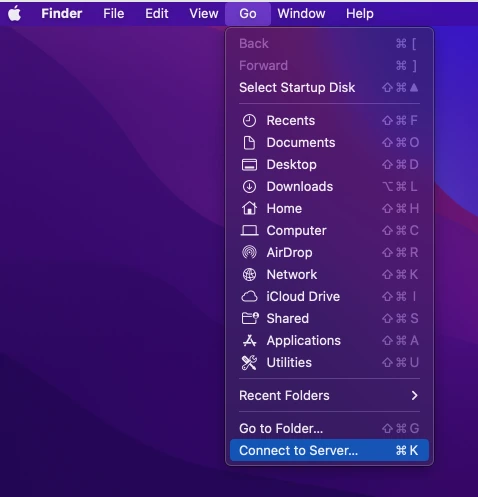 enter the value
 nfs://<ip of pi>/<path to share> in our example it is nfs://172.16.1.60/home/pi/shared_dir
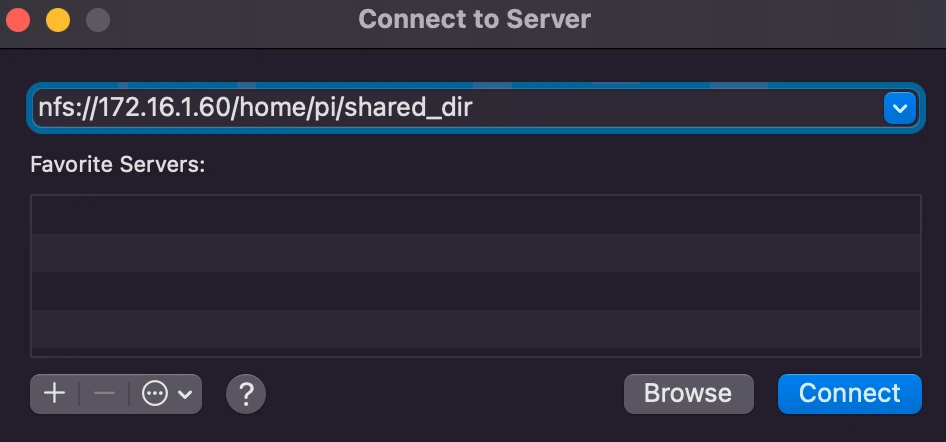 Press
Press connect and you should see the folder pop up
Option 2: Command line
create a director to attach the shared director to
cd ~
mkdir shared_file
mount the nfs drive on a Mac to the local /Users/owner/nfs directory
mount -t nfs -o vers=4 172.16.1.60:/home/pi/shared_dir/ /Users/owner/shared_dir
navigate to the shared directory
Web Server
If you have a program running on the raspberry pi that is generating data you may want to create a web server to display the information. For example, if the remote Pi is being used as a temperature sensor it may make sense to create a Web Server so that you can access the data via a web browser and present it in graph form or what ever way is easier to consume for your application. Maybe you are using a motion sensor to activate camera. In this case creating web server may be a good option as you could design the web page it to view the live stream and also see a gallery of all the previous motion activated clips.
1. Install flask
pip install flask
2. Download Images
create a directory called images and download a few images into it
3. Create Server
create a file named app.py and put the following code in it
from flask import Flask, send_file
import os
import random

app = Flask(__name__)

def random_image():
    """
    Return a random image from the ones in the static/ directory
    """
    img_dir = "./images"
    img_list = os.listdir(img_dir)
    img_path = os.path.join(img_dir, random.choice(img_list))
    return img_path


@app.route("/")
def hello_world():
    image = random_image()
    return send_file(image, mimetype='image/png')
4. Run the server
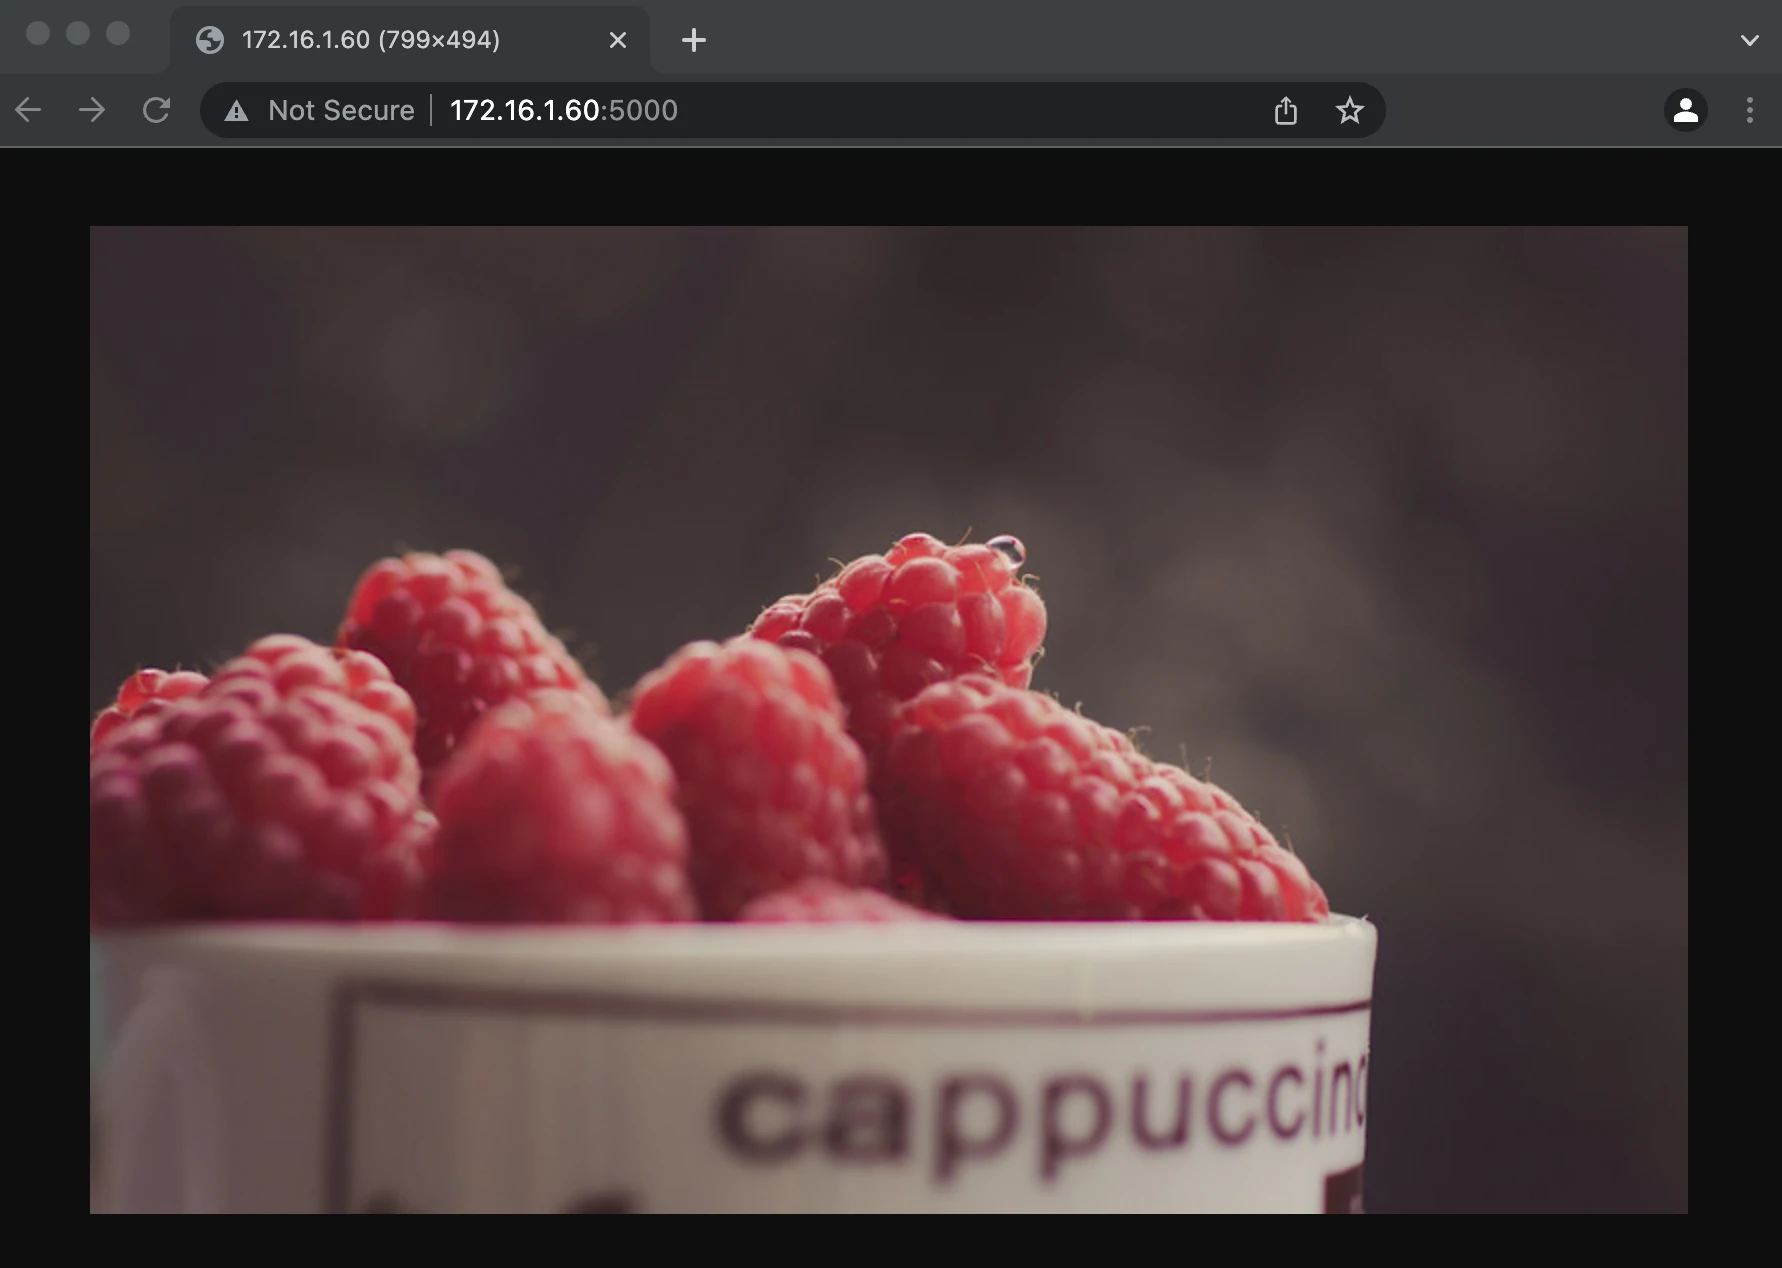
flask run --host=0.0.0.0
the --host=0.0.0.0 allows for outside connections to the flask server
5. View your custom image server website!
Additional Information
Default pi user and password
The Raspberry Pi Imager no longer sets a default user and default password so you will need to be sure to set one in the options while using the Raspberry Pi Imager
Raspberry Pi Imager Username and Password Setup
- Before flashing the SD Card click the
gearicon to go into the settings - set username and password - if we do not do this than we will be unable to login
Static vs Dynamic IP Addresses
By default, most devices connected to a network are assigned a dynamic IP address. What this means is that at some
time in the future the IP address of your device may change. This can be a pain if you need to access the device for
longer periods of time and don’t want to have to go track down what the IP address may have changed to. If this is your
case than you will want to assign a static IP address to your device. The process is not very difficult, but it will
require you to log into your router or whatever device is your DHCP server, if you don’t know it’s probably your router.
- Login to your home router
- You will need the username and password. It is usually on a sticker on the router
- The IP address of your router is usually the same as the IP address of your local computer but with a 1 or 254 as the last octet. Ex, your computers IP address is 192.16.1.23 than your router is usually 192.168.1.1 or 192.168.1.254
- Somewhere in your routers menus there will be an option to set up a static IP address.
- Apply the settings static IP settings in your router
- At the Raspberry Pi device go to the terminal and type in
dhclientto get your updated IP address - Run
ifconfigto make sure the Pi has the new IP address - If the
dhclientcommand did not work try restarting the Raspberry Pi- If it still does not work try restarting the router and the Raspberry Pi
- If you are still having problems double check that all the configurations are applied in the router
As an Amazon Associate I earn from qualifying purchases