Part 1 – Intro
1: Intro
2: Power
3: Signaling
4: Program
5: Sound The Alarm
Radio Control (RC) of a robot using an Arduino and RC Transmitter and Receiver
Recently, we here at The Quantizer decided to work on an project dubbed “Puppy Patrol MK1”. The idea is to create a robot that we could drive around, monitor my dogs, and yell at them if they get on the couch!
The purpose of this project is to show how to control a robot tank with an RC receiver and an Arduino.
Topics Covered
- PWM (Pulse Width Modulation)
- DC Power Distribution
- Arduino Microcontroller Programming
- Motor Controllers
The Process
Tools Used
- USB Osiliscope (Digilent Analog Discovery 2)
- Multimeter
| Name | Quantity | Cost |
| Tank Chassis | 1 | $67.95 |
| Motor Driver Board | 1 | $18.11 |
| Arduion | 1 | $20.50 |
| FlySky FS-I6X RC Transmitter with iA6B receiver | 1 | $56.49 |
| 9.6V 2000mAh NiMH Rechargeable Battery | 1 | $15.75 |
| Battery Charger | 1 | $23.59 |
| Miscellaneous | N/A | $15.00 |
| Total | $217.39 |
Some notes about the products above. We already had a lot of the materials lying around (everything actually) so we are using older things that what is linked above. Here are the differences. It is not critical that you use the exact same things, something close will work.
- Sparkfun quit selling the motor driver board but this board looks to be the similar
- The above link is for an Arduino Uno however I am using the older Arduino Duemilanove (Due mila nove is Italian for 2009, kinda cool to know)
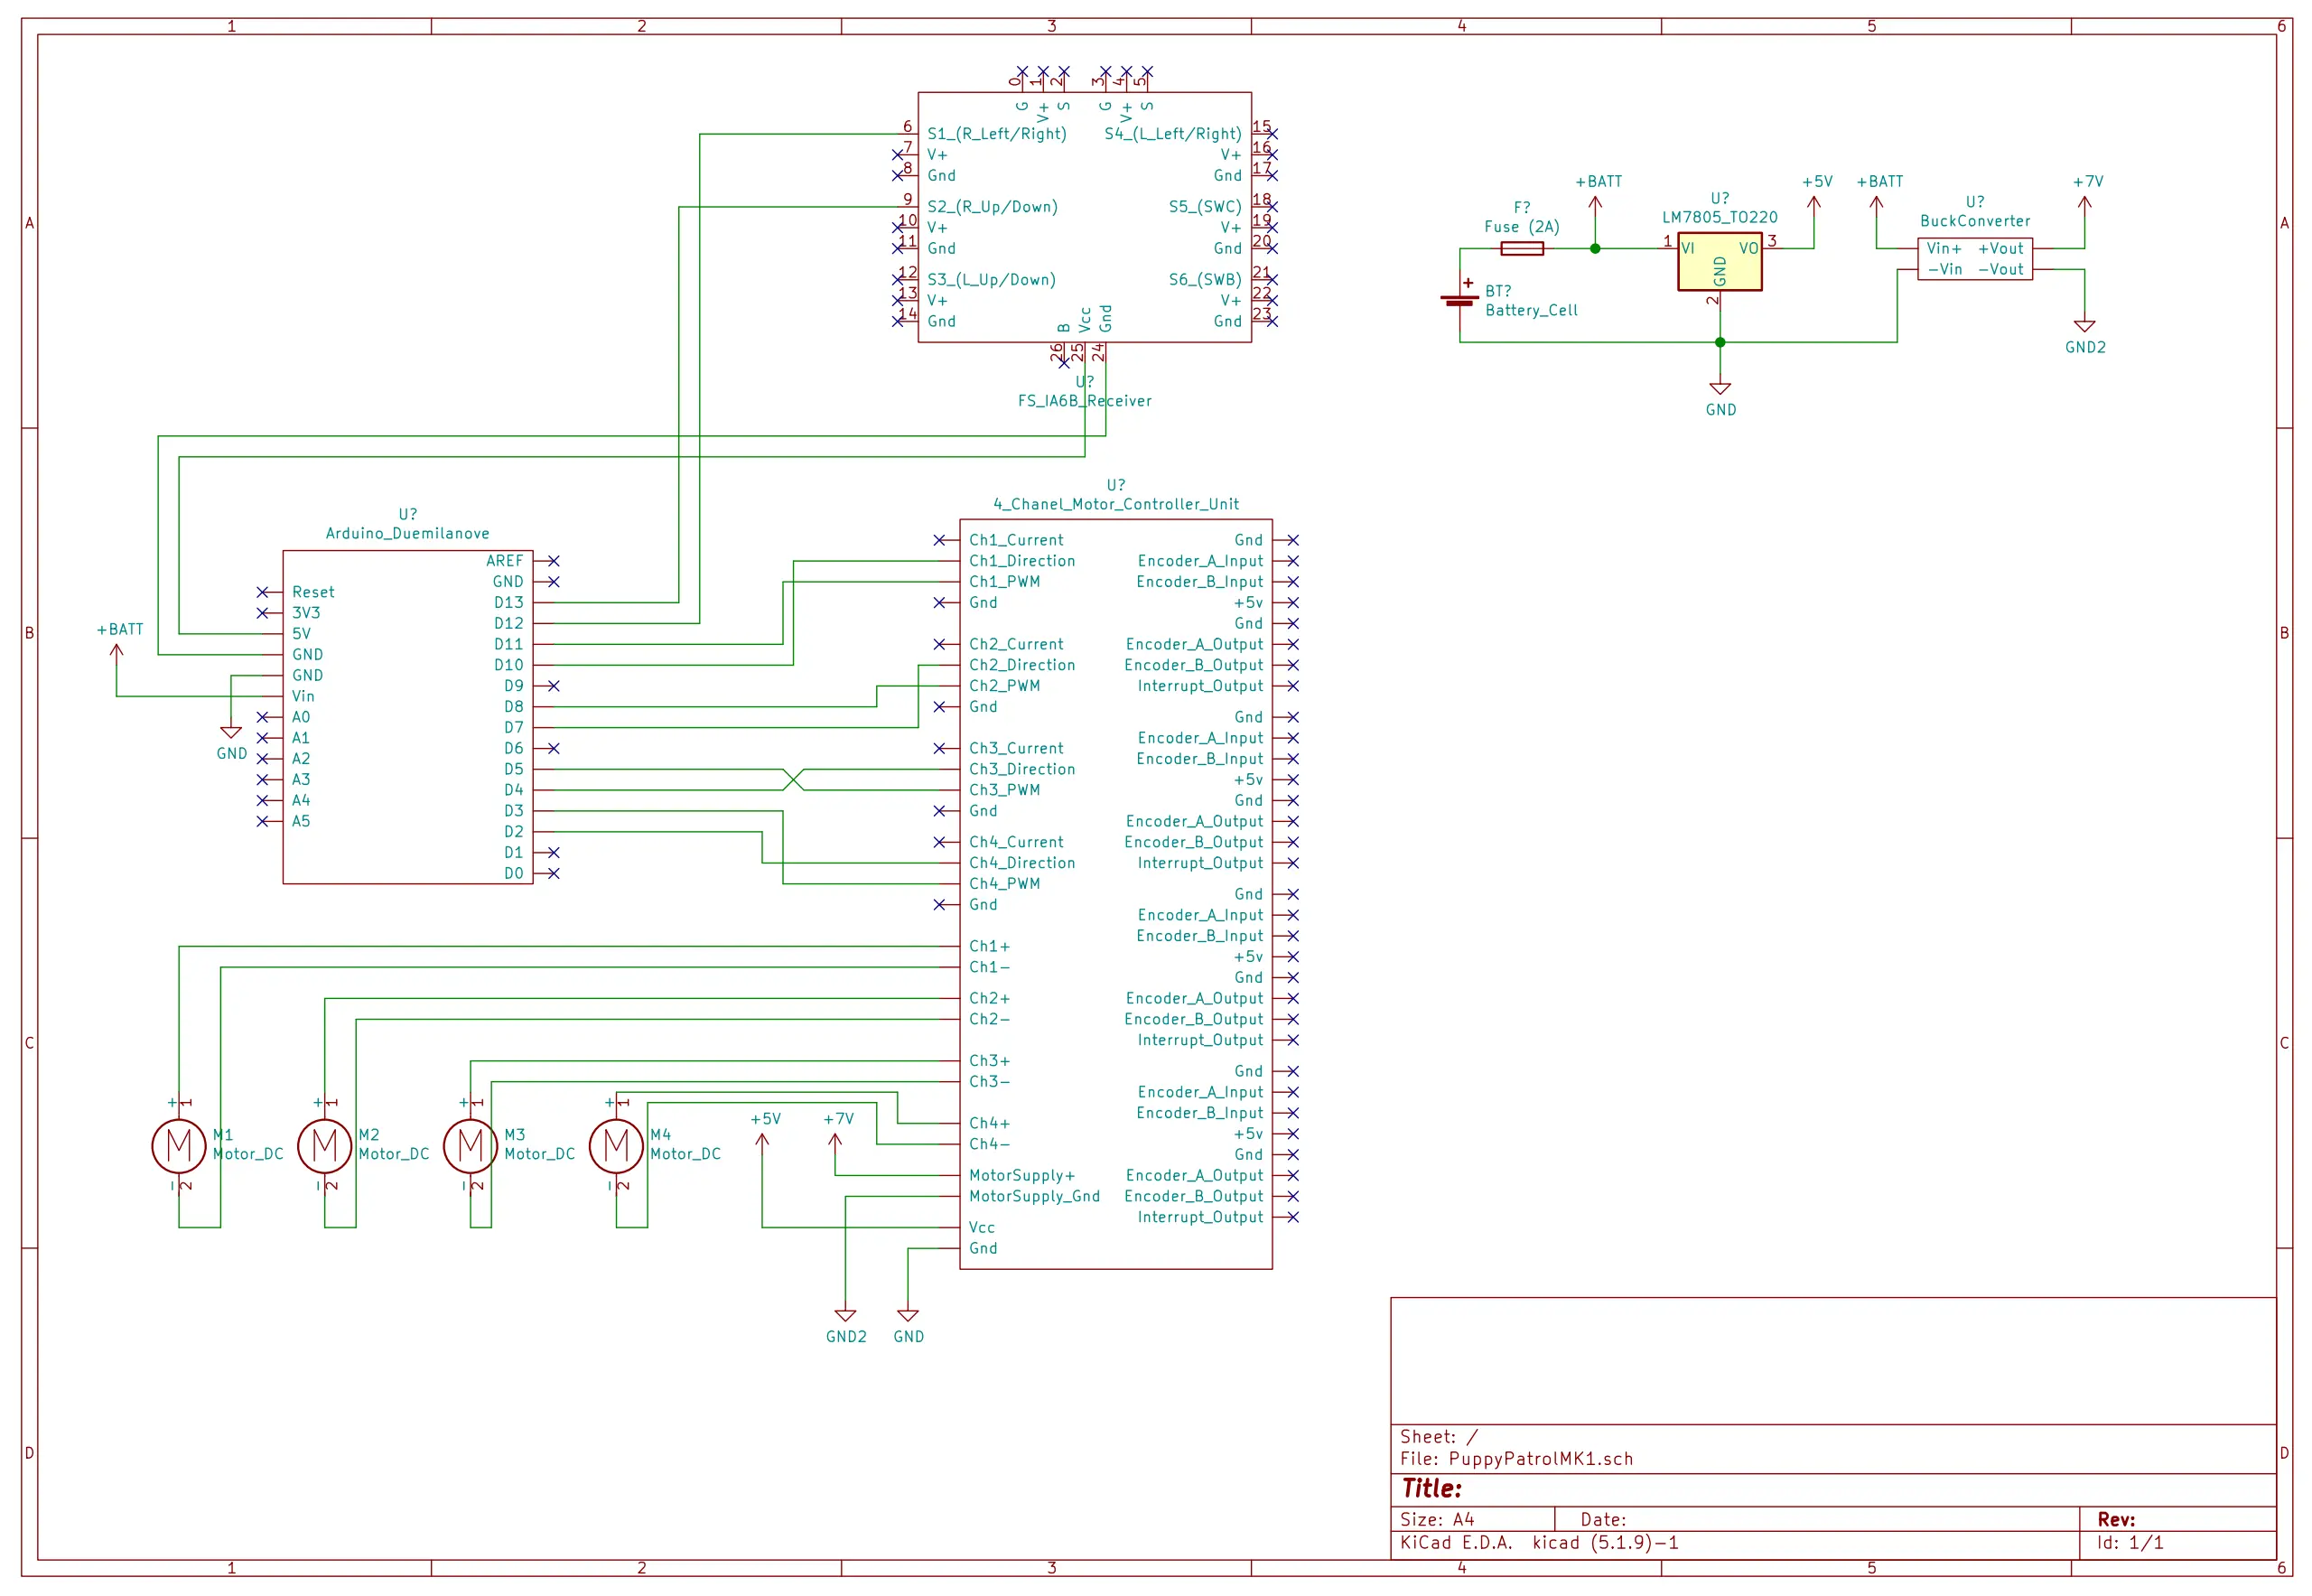
We will go into more details about powering the MK1 as well as the signals in between the components but here is the wiring diagram for what we will build.
So if this sounds like a project you are interested in than follow along and let’s make something!